When should I use Nitrox?

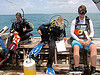
http://sargeantstudios.net/?p=119 When should I use Nitrox? 

If your planning a dive where you want as much bottom time as you can get,  then consider Nitrox gas mixture diving or Nitrox Diving, by breathing less nitrogen your body is less saturated and you are able to stay down longer.

East London What is Nitrox?

It’s enriched air with a higher percentage of oxygen and a lower percentage of nitrogen than the normal atmosphere. By reducing the amount of nitrogen in breathing gas, there is less to dissolve in our bloodstream for an equal time at a given depth. This translates into more bottom time with an additional benefit: a significant reduction of the effects of nitrogen narcosis.
Depending on the mixture, Nitrox can allow you as much as 50% more bottom time than the same dive with air.

Other advantages are shorter surface intervals due to less outgassing required and, at the end of a busy diving day, you’ll actually feel less fatigued due to the reduced physiological effort required to outgas. Another bonus that many Nitrox divers report is generally reduced air consumption, further adding to bottom time.

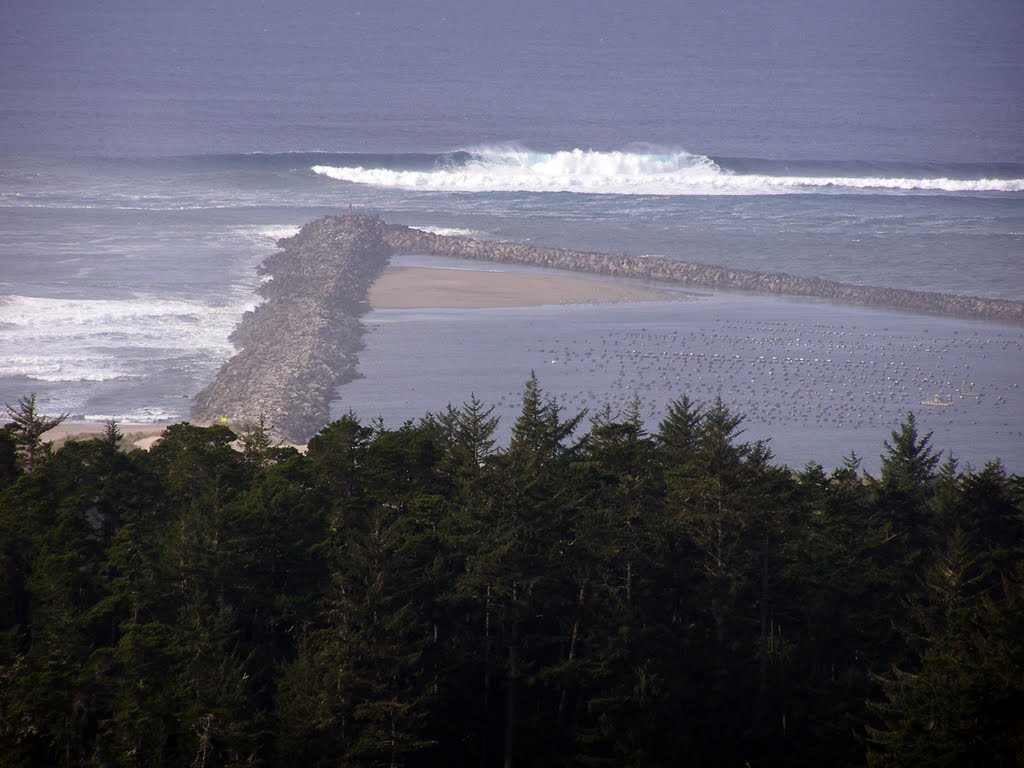
Nitrox diving is simple, beneficial, and most importantly, safer than diving on regular air. This is especially true in places like Cocos Island, where the diving profile is moderately deep and where, due to the excitement of the experience, divers have a tendency to stretch the limits of diving on air.

In order to maximize your enjoyment and optimize your depth for each particular dive-site, the actual dive profile selection chosen by our dive masters is based on the Nitrox mixture used.

Even if you aren’t interested in extending your bottom time, don’t forget about the extra margin of safety allotted by breathing a gas that has less nitrogen in it, nitrogen being the inert gas in air that is responsible for most decompression illness.

To breathe a sigh of relief knowing that you’re protecting yourself that much more. And most divers report that they feel less tired after a dive on Nitrox versus a dive on air due to the added oxygen in the air you are breathing. After 3-4 dives on a liveaboard vacation, that extra energy is pretty nice. “When should I use Nitrox”  like always!!


What’s in a Name?  (article from scubadiving.com)


Nitrox is the general name for any breathing gas with an oxygen content higher than the 21 percent found in air. By upping the oxygen in a diver’s tank (recreational nitrox blends contain between 28 percent and 40 percent oxygen — the most popular blends are 32 percent and 36 percent), you reduce the amount of nitrogen and therefore extend bottom times with the same nitrogen exposure as breathing air.

It’s a simple idea and it works — at moderate diving depths. The myth that nitrox lets you dive deeper, however, is a dangerous misconception. The problem comes from the fact that oxygen, while vital to keeping divers alive, can become toxic at high pressures. It’s a classic case of too much of a good thing.

Too much oxygen at pressure attacks the central nervous system, causing convulsions or seizures, visual distortions, ringing ears, nausea, twitching, irritability and dizziness.

These symptoms occur when the bloodstream is overloaded with oxygen. The oxygen not required for metabolism remains bonded to the hemoglobin or circulates as dissolved gas in the bloodstream. Supersaturated with oxygen, hemoglobin can’t transport carbon dioxide to the lungs. As the carbon dioxide and oxygen build up, blood vessels constrict, reducing blood flow to the brain and eventually interfering with the neuromuscular conductors.

Oxygen toxicity hits are very rare in diving, but if they happen under water, they happen fast and are likely to be fatal. Convulsive muscle contractions can lead to embolisms and loss of the regulator can lead to drowning. That’s why certified nitrox divers learn to calculate and manage their oxygen exposure.

So always remember it will keep you safe as long as you dont abuse it.


Thanks, from Greg and all of us at Scuba happy, and Safe Diving

Scuba Diving Mike’s Beach Resort at Hood Canal

Howdy Everybody this is Greg from Scuba Happy   😆  , I hope you  all had a Great Summer, and now lets have a great Fall/Winter Scuba diving season. And a Great place to go even during the winter when it’s snowing is Mike’s Beach Resort Hood Canal, located  38470 N US Hwy 101, Lilliwaup, WA.​ 98555.

I have been to Mike’s Beach Resort on Hood Canal many times through the years and have always had a great time, the people are great and the Rooms and resort in general are kept in very good shape. Here is the same Map that Mike’s Beach Resort  has on his website  CLICK HERE .

The future of smart fitness is subscriptions, but it shouldn’t be anavar pills Calorie tracking: How to track calories with a fitness tracker

There are 2 Links at the Bottom of this page that will take you to 2 Maps of underwater FUN at Mike’s Beach Resort at Hood canal.

The Diving is great most of the time and the water is very clear as compared to the Oregon coast with somewhat limited visibility, (you Oregon Divers know what I’m Talking about, 10 feet visibility is a great dive),  but you should always ask about the water conditions and weather when making reservations or planning a dive trip, the staff at Mike’s Beach Resort  will give it to you straight.

There are a lot of areas to search and explore when diving from the shore (from the Boat ramp) and the surrounding beach entry also, this is a place that a lot of divers get their Open water certification, the Instructors bring their Students here because of the water conditions and its salt water a certification requirement in most cases.

There are several structures that house many kinds of fish and shellfish, the crab are  fun to watch as they scurry with the outgoing tide along the bottom of the sandy sometimes rocky underwater scenery. It is really breathtaking to see the fish and other animals in their natural habitat coexisting with the many many scuba divers that go there each year.

You can find Oysters and clams laying in the sand while floating along the bottom, and there are sunken boats tom explore.

There are many Scuba diving opportunities, and several Night diving Locations in the surrounding areas within driving distance of Mike’s Beach Resort, it would be a good idea to check out a couple.

One is called Octopus Hole its around  20 feet deep or so, and you follow a rock ledge down to where the octopus live in the rocks, this is a real nice night dive, the couple times I have been there it was very clear water which made for a great dive. and the surrounding areas go down to 70 feet in areas away from the rock ledge.

Octopus Hole – is a wall about 20 feet (6 m) deep and a few hundreds yard long. There is no designated parking for Octopus Hole, forcing divers to park on the shoulders of U.S. 101. Caution is urged.

Another popular site is Sund Rock Marine Preserve, which features a rock wall and boulders that extend down 90 feet (27 m). Shore access to Sund Rock is controlled by Hood Sport ‘n Dive, which charges a fee. It offers an on-site porta-potty and hot showers at Rest-A-While Boathouse, which is three miles north of the city of Hoodsport.

Other Hood Canal dive sites include Sea Mount and Triton Cove. Divers should be careful not to kick up silt. With little to no current, disturbed silt requires a long time to settle. In some areas, visibility is murky on the top 10-20 feet but clears substantially below that.

Depths to: 600 feet (182 m)

Visibility: 40-60 feet (12-18 m) in the winter.

Water temperature: A dry suit is recommended.

Aquatic life: Wolf eels, octopus, and lingcod are the biggest draws but there are many other creatures.

Fees: Octopus Hole is free but there is a fee for access to Sund Rock Marine Reserve.

On-site amenities: At the south end of Hood Canal is Potlatch State Park, a 57-acre camping park.

More info: Along Hood Canal are two dive shops, Mike’s Beach Resort at (800) 231-5324 and Hood Sport ‘n Dive at (360) 877-6818, and a dive charter service, Pacific Adventure at (206) 714-1482 in Brinnon, Washington. The Web site www.masoncountytourism.com also is helpful.


  • Octopus Hole is located on Hood Canal between the towns of Lilliwaup and Hoodsport. It is 39 miles from Olympia.
  • Follow I-5 North to Exit 104, Port Angeles / Ocean Beaches
  • Drive 5.8 miles and turn right at the Highway 101/Highway 8 junction toward Shelton and Port Angeles.
  • Continue north on Highway 101 to Hoodsport.
  • Drive through Hoodsport to the Finch Creek Bridge (north side of town).
  • Go north for 3.1 miles to a turnout on the right side of the roadway where the road drops down to the water and there are no trees between the road and the water.
  • Park alongside the road.
  • Thanks to David Lei for the dive site map


Click Here for Mike’s beach resort Facilities Map, and


Click Here for another map of Mike’s Beach Resort at Hood canal.

Hey it has been a pleasure talking about  Mike’s Beach Resort at Hood Canal Washington.and the many Diving and water sport opportunities available there , so the next time your wondering where do I go now don’t forget Mikes.

Thanks to the Department of Ecology state of Washington Website for the photos and interesting aticle. and also thanks to Diving USA article on hood canal diving and Mikes Beach Resort. Thanks Greg @ Scuba happy  😆

Where Am I ? “Know your Compass”

Know your compass
Know how to use a compass

Know Your Compass

Learning to use your compass correctly is second only to buoyancy control . And for those of us that regularly dive in waters with limited visibility ( under 20 feet ) navigation skills are a must for safety.   Basic scuba certification courses teach very little about compass use and navigation.  Advanced diver courses present a lot more training and practice, as does a navigation specialty course. Both are worth while.  Yet we can all improve our navigation skills, regardless of what formal training we have had.  If you have basic knowledge about how to use a compass, and what the bezel is, then here are some tips and reminders  for you recreational divers that will improve your navigation skills.

  1. Believe the compass. (Always set your compass heading and know your return heading and do not 2nd guess your compass)
  2. Always know the underwater terrain in the area your diving to better prepare for navigation underwater.
  3. Take a heading from boat or shore, and know where you are going and plan a course of return.
  4. Set your Compass pointing it the in the direction you want to go,  twist the bezel to the center of the 2 small pointers or arrows on the bezel, this is your heading, to find the return heading twist the bezel to the 1 point or arrow on the opposite side of the first heading and this is your return heading.
  5. Always make sure that your compass is level underwater when determining and following your compass heading. move slowly and watch your compass as you fin kick for propulsion to take you to your destination.
  6. Make use of and remember underwater landmarks (Rocks, ledges, sunken trees ect…) and remember their location to further confirm your return heading.
  7. Always be thinking about how to make your navigation more precise.  And NEVER second guess your Compass.

A good way to practice using your compass is on land, you can find a landmark on land and take a heading and remember this number , placing the arrow in between the 2 dots, watching your compass, only follow your compass and walk over to where your compass takes you counting your steps until you arrive at your destination

Now add 120 degrees to your first heading and set your bezel for the new heading, walk about the same distance to the new location, underwater you would keep track of your fin kicks to calculate distance. Once you arrive at you new heading add 120 degrees to your last heading and using your compass follow it to the new location or hopefully your original starting location.

Its a good idea to put something on the ground at the starting location and at each change of heading location  (rock, stick, ect…)  to see how far off you were from you intended destination, keep in mind that in the water you will have to calculate the current and other underwater obstacles to keep on course. Know Your Compass

How to Calculate your Buoyancy

Archimedes Principles


“How to Calculate your Buoyancy”

Hello again, Greg at Scuba happy here, today we are going to take a look at the factors you have to take into consideration when calculating just how much weight you will need to get neutrally buoyant, which is the goal of all divers for a safe fun dive.

We want to descend with ease, but the buoyancy in our wetsuits, our BCs, our lungs are all keeping that from happening.
To overcome buoyancy you have to counterbalance it with ballast weight.

The question is, how much? While the answer is different for every diver, the goal is the same: carry enough weight to enable you to function safely at all depth.

Divers are taught that to be neutrally buoyant in their Open Water class during the scuba certification class. The basic method is to carry 10 percent of your body weight in lead.

The surface float method is tested in full scuba gear, have enough weight to evenly distributed to enable you to float in the water at eye level.
But rather than just blindly piling on the lead, why not break it down to find out why you need to carry the weight, and what are you actually counterbalancing.

When you calculate your buoyancy at depth, you can determine where your counterweight needs are, and shows you ways to reduce the amount of weight you have to carry.

Archimedes Principle

STEP 1: Calculate for Your Body 
How much weight do you need to make your body neutral? Take a few weights into the water wearing just a swimsuit. You will be perfectly weighted when you can hang motionless with half a breath, and sink when you exhale. ( A snorkel can make this test easier.)

STEP 2: Calculate for your Wetsuit or Drysuit
Wearing your exposure suit, get into the water and repeat the procedure outlined in Step 1. Then take the total amount of weight required to get neutral, subtract Step 1’s total, and you’ll have the net buoyancy budget for your exposure suit.

A wetsuit can have two to three pounds of buoyancy for every mm of thickness. If you wear a neoprene drysuit, consider that compressed or crushed neoprene suits have much less buoyancy than standard neoprene. If you wear a fabric drysuit, remember that thinner undergarments have much less buoyancy than the puffy stuff.

STEP 3: Calculate for Your BC 
BCDs can be a source buoyancy, especially the older models that have lots of traditional-style padding. In years past it was common for BCDs to carry upwards of four pounds of added buoyancy, which means, that you need to add at least four pounds of lead to compensate for it. Fortunately, most of todays BCDs have a lot less buoyancy built into them and that makes it easier on the diver to get the correct amount of weight for his specific water conditions.

To test your BC’s inherent buoyancy, submerge it while venting all exhaust valves to bleed air from the bladder. Knead the padding in the shoulders and backpad and behind the pockets to release air bubbles. Slowly rotate the BC to enable any trapped air to escape. Be patient, allow plenty of time for water to displace the air in the material. When you stop seeing bubbles, release the BC into the water column. If it heads to the surface you’ve got some inherent buoyancy to deal with. Add weights until the BC will hang neutrally buoyant in the water. Then count up how many weights it took to get there and you’ll have your number.

STEP 4: Calculate for Your Tank
The buoyancy characteristics of tanks vary widely. For example, a standard aluminum 80 is 1.6 pounds negatively buoyant when topped off, and 2.8 pounds positively buoyant at 500 psi. That’s close to a four and a half pound buoyancy differential between the beginning of a dive and the end of a dive that, of course, needs to be dealt with by adding ballast weight.

A steel tank, on the other hand, tends to start off negatively buoyant and stay that way. For example, a high-pressure 80 is about nine pounds negative when full and three pounds negative when empty. That’s three pounds that can be removed from your weight system.
Tip for Shaving Ballast Weight: Switch from an aluminum cylinder to a steel cylinder.

STEP 5: Calculate for Everything Else
Gather your regulator, gauges, knife, fins and any other items you regularly dive with, place them in a neutrally buoyancy mesh bag, and submerge it. The goal here is primarily to see if the total package is positively buoyant. If it is, add some weight until it becomes neutral. If it’s negative it probably won’t be by much, so consider it a ballast slush fund. It’s not working against you, and that’s all that matters.

STEP 6: Your Neutrally Bupoyant
This should be very close to your target ballast weight requirements, and it should also give you a clear picture of where your biggest buoyancy challenges lie. To double-check your calculations, gear up with all the components you measured separately, get back into the water and repeat Step 1. If the above scenario played out like it’s supposed to, you should be floating at eye or forehead level in a relaxed position. When you exhale you should start to slowly sink. If not, you couldn’t be more than a pound or so off your target. Make the final adjustment and go diving.

SALT WATER VS. FRESH?
If most of your diving is done in fresh water springs or lakes, then ballast calculations should be done in fresh water. If you dive mostly in the ocean, then do the calculations in salt water. If you switch back and forth, you’ll need to adjust your ballast needs as you go. Be prepared to add anywhere from 4 to 7 pounds going from fresh to salt water.

Thanks from all of us at Scuba happy for reading our Blog and please join the conversation at scubahappy.com.

A big thanks to John Brumm’s article at scuba diving online which was used as research for this Blog.  Lets stay safe and get Neutrally Buoyant.

Weed-Infused Wetsuits ?

Patagonia’s New, Weed-Infused Wetsuits?

Howdy again, Greg at Scubahappy.com here, I did a double take too when I first saw this, New Weed-Infused Wetsuits ?, But this is a very good idea for getting rid of the petroleum based products that plague our planet. I am amazed at the ingenuity and determination of the manufacturers of today, and hope that this phase of new green products keeps growing and I am sure that it will for the sake of the next generation.
Photo courtesy Patagonia

One would think the surf industry would already be at the forefront of environmentally conscious practice—after all,  sand and sun already seem to have an inherently eco-friendly sheen about them. Yet most wetsuits are made of neoprene, a decidedly anti-green material that is both petroleum-based and nonrenewable.

Patagonia, the outfitter of all things outdoorsy, and also guilty of manufacturing neoprene suits, recently decided to take a hard look at their own offerings, introducing a revamped wetsuit comprised of 60 percent “biorubber” and only 40 percent neoprene (hey, it’s a start). This natural biorubber, made by biomaterial manufacturer Yulex, is derived from guayule, a desert shrub that grows in the American southwest and doesn’t require much water to thrive.

Patagonia hopes to encourage their competitors to adopt biorubber into their own products, so that not only can the use of neoprene eventually be eliminated but also, as the market grows, the consumer cost for these eco-conscious wetsuits can decrease—currently one will set you back between $529 and $549. Ouch.

Apparel companies have been tossing more muscle behind material innovation, maybe in a nod to our planet or possibly just in response to the increasing consumer interest in the story behind their clothes, but price point has consistently been an issue. Sure, most people support or want to support a greener lifestyle, but what if their budgets just can’t handle it?

To what degree will they open their wallets to match their ideals? Time will tell how well Patagonia’s guayule wetsuit will fare in the market, but to nudge surfers into buying biorubber, a well-placed weed joke in one of their fall advertisements probably doesn’t hurt either.

© Mat McDermott

Right now surfers can buy wetsuits made from greener versions of neoprene, but none of these really can be considered a truly green product. Now, Patagonia has announced a potential large step forward on this front: Producing the first wetsuits in the world made from a plant-based alternative to neoprene.

The Ventura, California-based company has partnered with Yulex Corporation to make wetsuits using guayule, “a renewable, non-food crop that requires very little water, is grown domestically in the US, uses no pesticides, and in comparison to traditional neoprene, has a very clean manufacturing process.”

© Patagonia

Patagonia surf director Jason McCaffrey:

After four years of working together, Patagonia and Yulex have co-developed a unique material [photo above] that allows us to make a wetsuit that is 60% guayule based. Our goal is to have the formula be 100% plant-based, but we feel that for now this new material is a big enough step forward to let the world know it is possible to buy something clear. It’s our hope that other brands see this as interesting and join the effort to innovate and implement alternatives to traditional neoprene.

The wetsuits are slated to roll out in Japan, and this spring you’ll be able to order them custom from Patagonia. A global roll out will follow.

Haven’t heard of guayule? Don’t feel bad, I had to look it up, too.

USDA/Public Domain

Guayule’s scientific name is Parthenium argentatum. A flowering shrub in the aster family, native to the southwest part of the United States and northern Mexico, it’s been used as alternative to latex rubber since pre-Columbian times, with its modern common name coming from the Nahuatl word for rubber.

Wow I think we will see this simple yet complex process grow in the next few years, because we need to push away from the petroleum based products. Thanks for reading my blog and I hope you will think green as we here at Scubahappy.com do.

Thanks to Patagonia’s for the photos and the Information for this article. Weed-Infused Wetsuits, absolutely brilliant idea.

also a Thanks to treehugger.com blog and GOOD magazine for the wonderful photos and the research information used for this article.  Good Job Guys.

Thanks, Greg  at Scuba Happy

Life saving Life vest for Water Sports NEW

Hello,  and Welcome again to the Scuba happy Blog.  This week we are looking at a new product, the finest life saving life vest on the market, this is a  New Innovation being used to help save lives, I  want to get this to everybody that enjoys the water and wants to stay safe.

This New Product is called Aqua life Inflatable Shirt and is manufactured by Aqualifeglobal.com, and this life vest is amazing for any water activity.

The Aqua Life Inflatable Shirt is a close fitting shirt that is designed to be used in water activities where protection or buoyancy is required. The shirt is ideal for all water sports. The patented zip up front makes the shirt easy to wear and take off.  Aqua Life inflatable shirts are designed for maximum comfort and support. The shirts are double lined eliminating itching, chaffing and scratching.

The embedded and adjustable waist band ensures the shirt stays snug to the body in all conditions. It won’t fill up with water or ride up like a wet t-shirt, or even worse, be pulled off in rough surf conditions. Some of the more frequent uses of the shirt include: swimming, surfing, body surfing, body boarding, water skiing, surf skiing, snorkeling, canoeing and kite surfing. If it involves water, then a “Aqua Life” shirt should be considered. The shirt is available in all sizes and suitable for all ages from 2 to 92. Aqua Life inflatable shirts are available in a variety of colors and can be made with matching company logos and other options. Optional configurations include, but not limited to: short, long or no sleeves, strobe lights, whistles for attracting attention, and many many more.

http://youtu.be/mpuC6NcbFag

Specifications

Manual and Automatic Inflator
All Aqua Life vests come fitted with manual or automatic inflators and have a manual inflation tube as well as a failsafe backup. With the Aqua Life Inflatable Shirt, the user is able to manually inflate the shirt through the backup tube to give added buoyancy. This feature is particularly useful in situations like learning to swim, taking a breather while snorkeling and adding a bit more buoyancy when body surfing.

The Aqua Life Inflatable Shirt is fitted with a manually activated inflation system as it is designed primarily for use in water. However, if required, an auto inflation system can be fitted to any shirt. If the inflation is activated, the shirt will inflate in less than a second.

Lifesaving Lifevest Shirt
life vest shirt


This is a great product, Please visit the website (Aqualifeglobal) and show your support for this new innovative ground breaking Life saving Shirt vest for all water sports around the world.

Thanks for reading my blog and look out for the next one. Thanks Gregory  @ Scubahappy.com.

October Newsletter Scuba Happy

Scuba diving Woahink lake
A view from the heavens of the wonderful Woahink Lake.

Howdy all, and welcome to the October Newsletter for Scuba Happy, with Summer over and Fall beginning,  it’s finally here, October that is, and now its time to get ready for the Goooooools and Goblins.

October is a rainy month usually in Oregon and especially on the Oregon South Coast, where my home headquarters is located. The rain brings a lot of limited visibility Scuba diving here on the coast but there are still several diving avenues to take when trying to find a nice spot to dive. You can look to Eastern Oregon areas and do some fall River or Lake diving to keep your skill up and running.

A very popular spot in Eastern Oregon is Clear lake, This would be a High Altitude dive so your diving times would have to be watched but I have been there several times and it has always bee a great time. You can see the under water petrified trees that are only visible from under the water.

Woahink Lake, located just North of Florence Oregon, is always a great spot to hone your skills when you are wanting to keep diving during the Fall and Winter months. Always remember to go through you Diving Gear before you head out to a site. You can organize an event and meet with other Scuba divers there at Woahink because they have a shelter and several picnic tables, and the diving is fun  and there is a lot to investigate and real easy on the Dive gear. Through the years many objects have been placed under water at several locations for new divers and Scuba divers honing their skills to find so it can be much fun.

Here is a Map of the Lake and Parking area and the location of all the underwater objects to hunt for.


Woahink Lake Diving Map

There are many boats and other neat stuff to search for.

And just across Highway 101  and oposite side of the highway is Honeyman Campground, and there is a a few areas to dive and nice places to park, if you venture to either of these areas contact me at my Website Scubahappy.com and I will grab my dive gear and meet you there or I can give you additional instruction on where to go. Here is a Coupon Code (0001) for  5% off your entire cart at checkout.

This is my First Newsletter for Scubahappy.com, we will post our Newsletters on the 1st Friday of each month, and our Blogs will Post weekly, we may post more Blogs if we find and want to inform our readers of  new innovations that are available or possibly new and exciting products that our readers may enjoy.

Remember if your Scuba diving off the Oregon Coast and need more information, please contact me at my website Scubahappy.com and I will get the Information for you so you can have a Great dive. Here’s to having a Great diving Month.                           Have a Scubahappy day.  Greg


Scuba Diving the Oregon Coast (Winchester Bay-Triangle)

Scuba diving the Oregon Coast (Winchester Bay Triangle) is a very easy and fun dive, it is called the triangle because the jetty rocks form a Triangle (view the Photo in Post) , also the home of Triangle Oysters where they raise the oysters and harvest for sale and is located in the Boat basin area close to where the boats are put into the water at the boat dock.

So Grab you Dive Gear and lets go.

You will find  The Triangle access road if you stay on the main road keeping the water and the boats on your right heading west.

When the main blacktop road starts to make a left you will see a gravel road off to the right, this is the road you will want to take, you will pass the emergency storage building for helping dune accidents .

If you continue up the gravel road  you will see a opening in the fence on the right side, this is where you turn to get into the parking for the triangle area.

Once you arrive at the parking area you will see the Coast Guard lookout tower, this is used for watching the water condition and looking for any stranded boats that may need assistance.

You can park alongside the road and begin to get your dive gear ready. Once you are ready you can work your way in the sand to the water’s edge.

In full dive gear walk out into the water so you can begin to put your scuba fins on, once you have your dive fins on  start swimming or back kicking your way to the center of the triangle, get close to the rocks and drop down to the rocks below, if you are too far away from the rocks you may loose your way and end up in the sand and have to surface later just to find out where you are.

There are 3 Culvert tubes that go thru the rocks and this is the way some of the fish get into the triangle from the bay opening. So if you stay relatively close to the tubes you should se some fish.

You can work your way under water to the other end of the triangle where it is a lot of sand and once there start you under water journey back to your entry point.

You will usually see many fish and everything else you would see in the open ocean, but this diving area is all enclosed so it is not affected by the surge too much, and the tide changes come slower too.

I have dove this spot many times and it is very fun to take your time and have a easy dive and not have to fight the currents and surge.

This is a very good scuba diving spot for a beginner, and gives you a way to test your dive gear,  with no water surge or current you can explore your heart away and not have to worry.

Enjoy and let me know how your dive was at my website, Thanks and have a great Dive.  Greg  at Scuba Happy  ( 5% off  entire cart on dive gear with this Coupon (0001) at checkout).


Scuba Diving Winchester Bay Oregon (Half Moon Bay)


Half Moon BayScuba diving Winchester bay in Oregon on the Oregon Coast is always a challenge, with the weather changing in the blink of an eye you have to keep alert to changing weather and water conditions.

Always check weather conditions when you and your buddies are planning a dive and always be prepared to cancel a dive if the weather is too severe.

Be sure and make this dive during the tail end of the high incoming tide, or slack tide, which means there is a small window of about 30 min to 1 hour that the tide will make little movement at that time.

You can follow with the incoming tide current and not have to struggle against the tide, so it’s kind of like a ride with the current taking you for a ride.

Winchester Bay on the south Oregon coast is a very beautiful place for scuba diving and  any other outdoor activity you can think of so get you dive gear ready.

The community  of Winchester Bay is a very quiet place  full of things to do,  and trying out your new dive gear is one of them, local scuba diving is one thing I love around here.

Half Moon Bay is located at Winchester Bay just head towards the water and keep the boats and the water on your right when driving through.

The main road will take you to the sand dunes, for 4X4 action and adventure, when looking for Half Moon Bay we leave the main hardtop surface road on to a gravel road that takes you to the Coast Guard tower for watching for distressed boats.

As you see in the photo above Half Moon Bay is in the bay but out of the main current and swells that bombard the shoreline.

Just as you turn onto the gravel road there is a small building to the right, that building is used to store the emergency vehicles used for emergency situations that come up from time to time out on the dunes.

You can park in the area just before the emergency building, back up you vehicle and start getting your diving gear on.

Once your dive gear is on you can make your way towards the rock jetty across the sand towards the bay, it is a bit of a trek and walking through the sand in full gear can be tiresome but not too bad, just take your time.

Now you will want to take a compass bearing across to the other side of the north jetty so your return trip will bring you back to the south jetty rocks.

After you have arrived at the rocks you will find a series of large flat rocks that you can enter the water from, the best way is to slowly work your way along the slick rocks to the flat rocks, once there sit down on the rocks and put you fins on, being sure to keep your air regulator mouthpiece in because you can have a large wave come up on you without notice during swells.

When you have your gear securely ready you can enter the water,  float on top of the water until You are ready to descend.

Now you can descend to the rocks below. Once on the rocks you can start to work your way to the bottom, there is a lot of beautiful colors and underwater structure when going to depth, the large rocks will hide many fish and crab that you will see.

When you are on the bottom close to the rocks you will notice there is less current, so stay close to the rocks for more control.

If you are fishing with a speargun you will need to work your way up and down the rocks to scare the fish out into the open. There are several varieties of fish that call these rocks home, Lingcod, Black Bass, cabezon, pileing Perch, and many more. (TIP: always check your dive gear and speargun bands before heading out to spear fish).

The current will take you to the end of the rock jetty where you can work your way around the end and into the Half Moon bay, there are a lot of crab at this spot so take you time and save some air so you can check out this area.

You will come back up into about 4 feet of water , this is where you can remove your fins and walk back to your vehicle.

If you decide to try this dive, and I would, please leave me an email at scubahappy97459@gmail.com and If I can I will come down and join you.

Thank You Very Much,  and keep diving  Greg @ Scuba Happy


Diving The Oregon Coast Florence Fish ladder

Florence Fish LadderFlorence Fish Ladder map


When you are diving the Oregon Coast Florence Fish Ladder at the Florence north jetty you are in for a treat, there are a lot of very interesting sites and many ways to get your bounty of some very tasty Cockle clams, a Very tasty morsel if you like clams.

As you see on the map there is plenty of parking at the site, You can back you vehicle up to the fish ladder opening and prepare for the dive, very handy parking area, there are a few picnic tables that are there for you lunch plans after the dive.

I always recommend taking a buddy with you for safety’s sake when diving this area because there are strong currents and surges to deal with and it is always a good practice to have a dive buddy with you in any situation and always check your dive gear with a mandatory dive gear checklist prior to heading out.

After you have put you gear on you can work your way down the fish ladder steps to the opening of the structure. Once at the opening get into the water and put your fins on and mask. float your way to the mouth and take a compass bearing of the Green buoy that is visible looking east from the opening of the rocks.

After you have your compass set and re-checked your dive gear you can descend slowly to the rocks below, you will see a Large Pipe you can follow down to the bottom, once at the bottom check and adjust your position to head towards your compass heading you set on the surface.

As you follow your compass heading towards the green buoy you will see a lot of clams and crabs along the way so be sure and take your collection bag to gather clams and crabs for dinner and some wonderful clam chowder.

After following you heading for awhile you will come to a rock ledge that falls off to about 65 feet (depending on tides and current) and this is called the crab hole where you can find some crab and clams also for your troubles, you can follow the rock ledge along the bottom which takes you farther into the center of the bay and you will find some larger boulders there that I have speared some large Lingcod a local favorite.

When you start to run low on air you can head back up the rock ledge and follow your compass back to the fish ladder, you can head back using your compass and trying to work your way to the right and follow the rock jetty rocks back to the fish ladder opening, once you feel close to the opening you can come up and see exactly where you are and surface swim back to the opening.

This a favorite spot of mine because it is very easy to dive also very easy on the dive gear, and there are clams and crab to harvest, visibility can be an issue but if you trust in your compass and take your bearings correctly you will have a blast, have fun and keep Diving, see you there.  Thanks Greg @ scubahappy.com.


Happy Diving