Why Regulators Leak

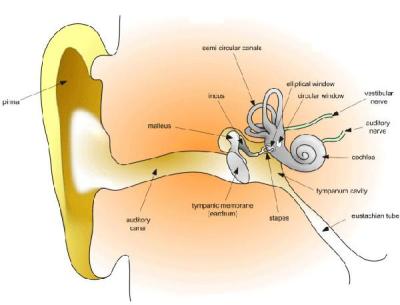
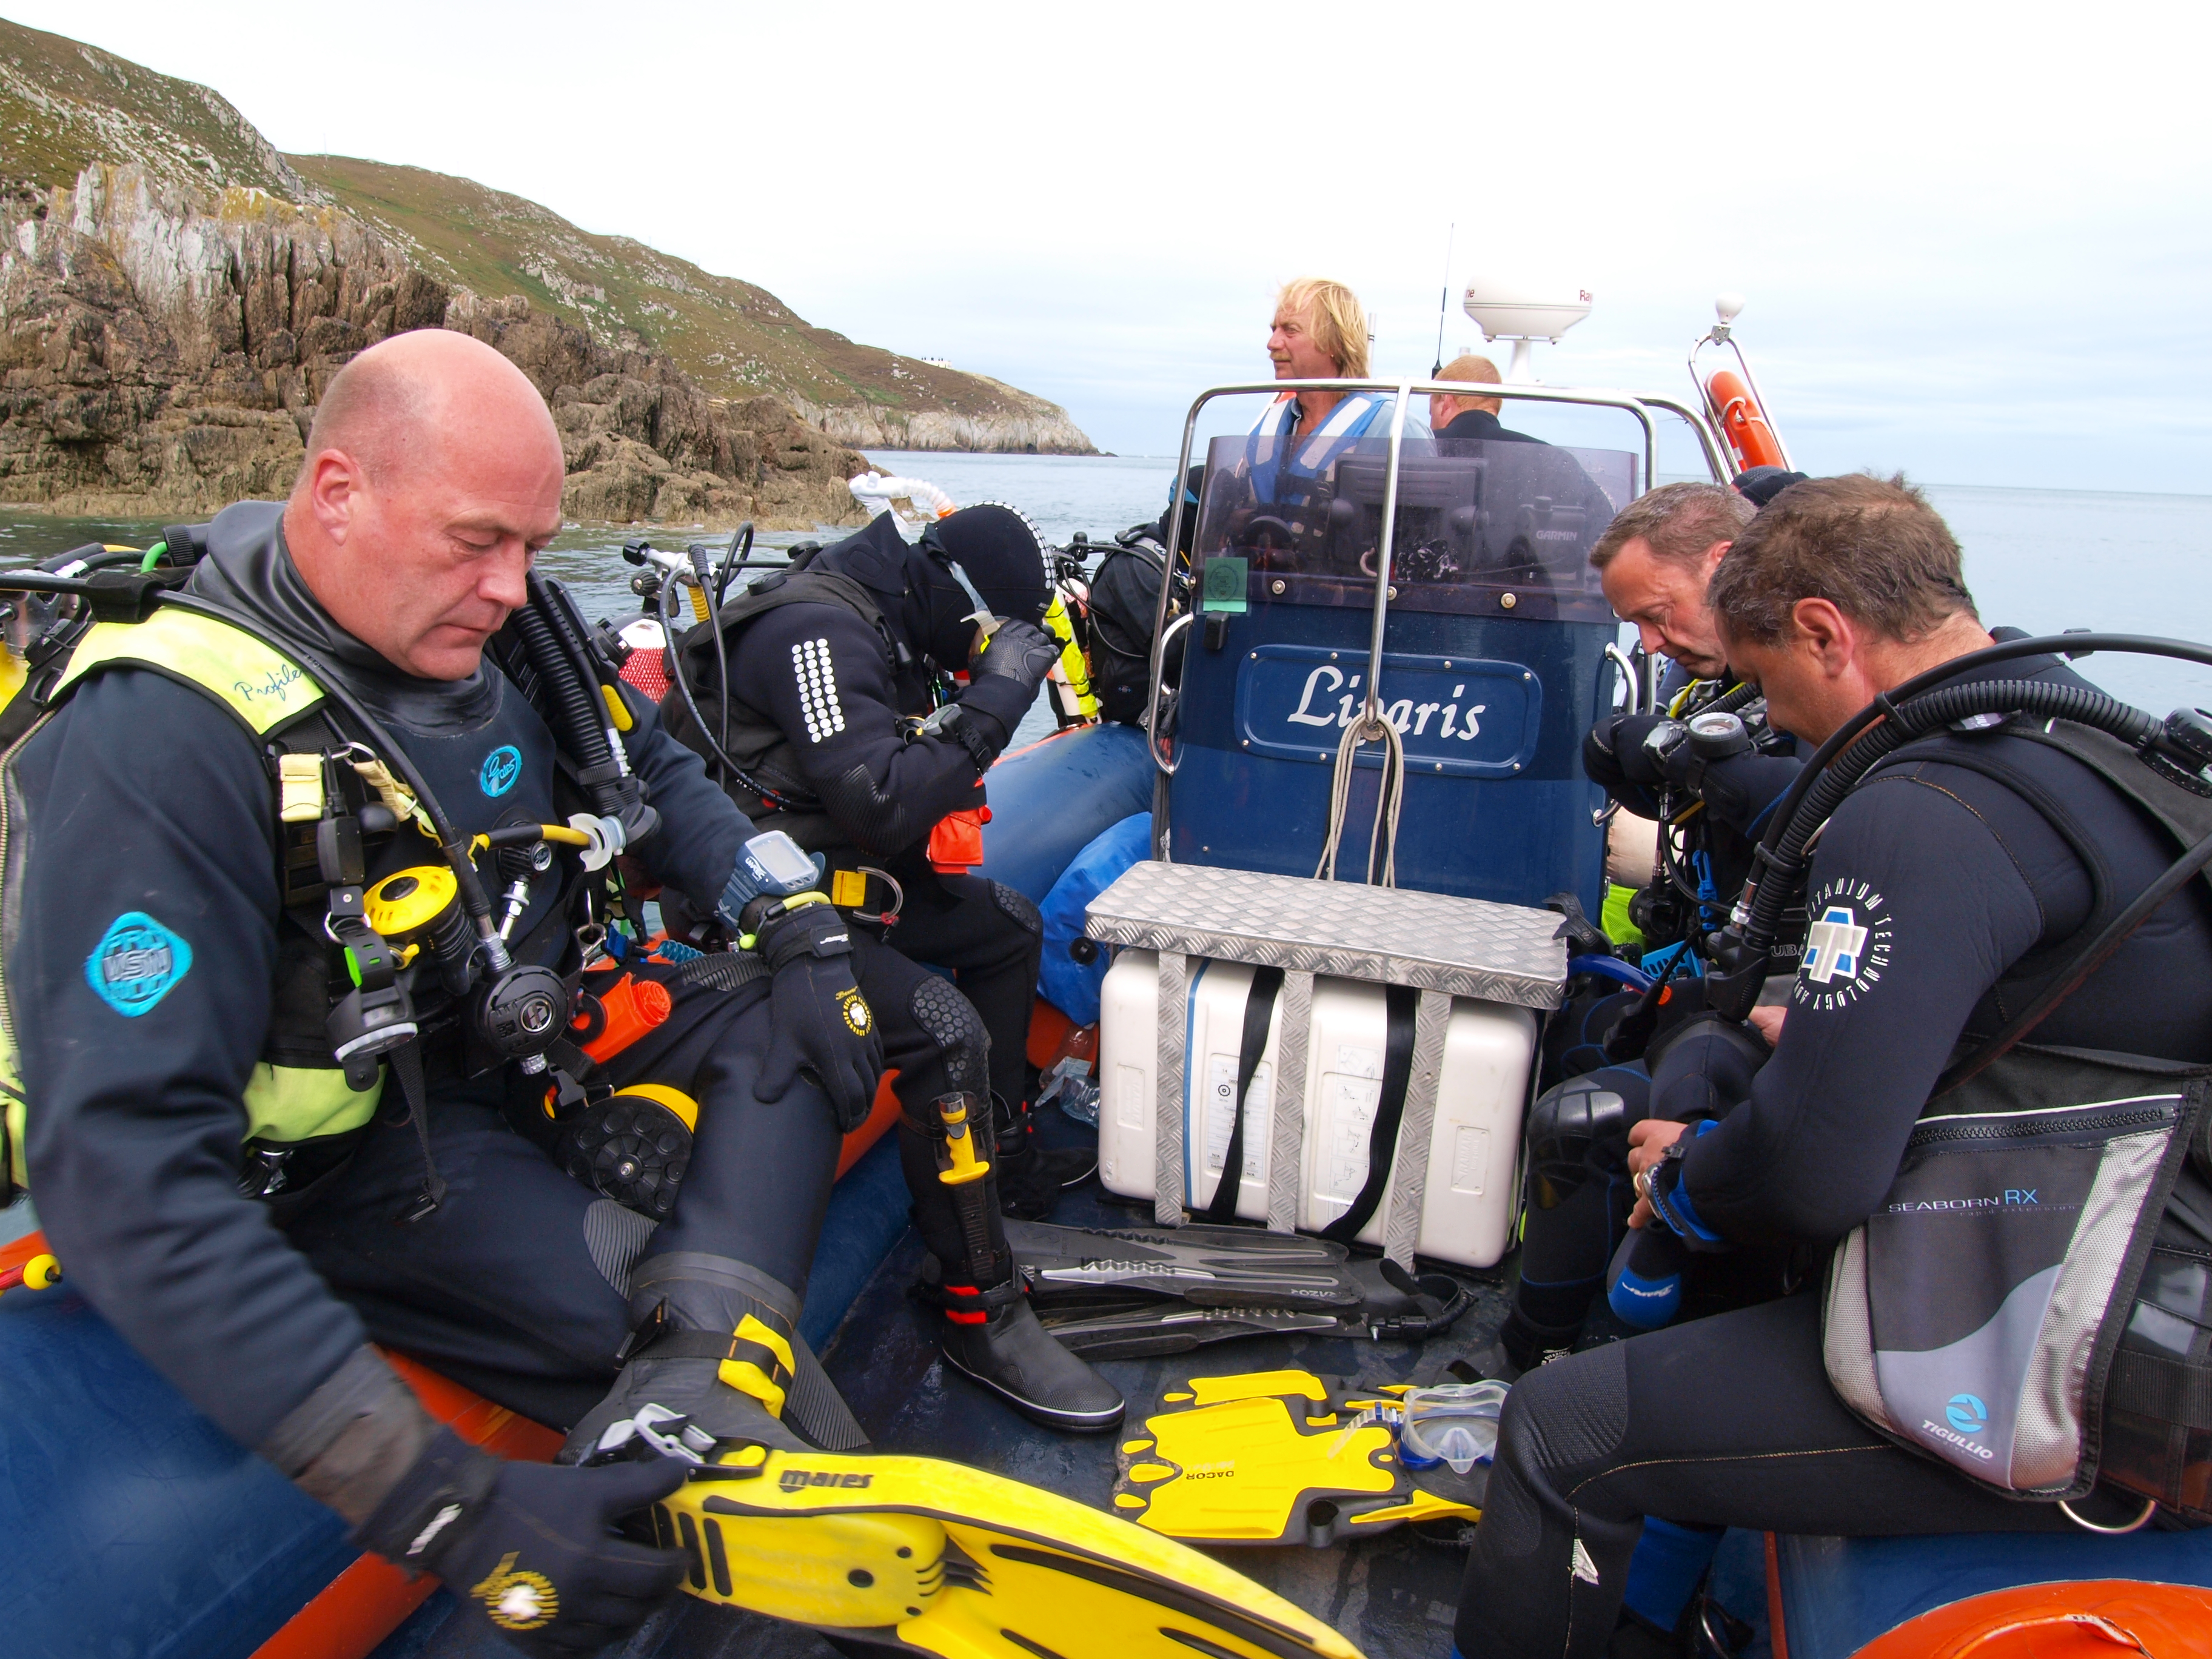
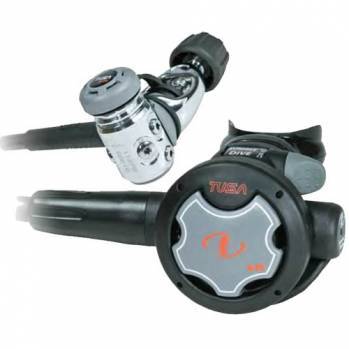
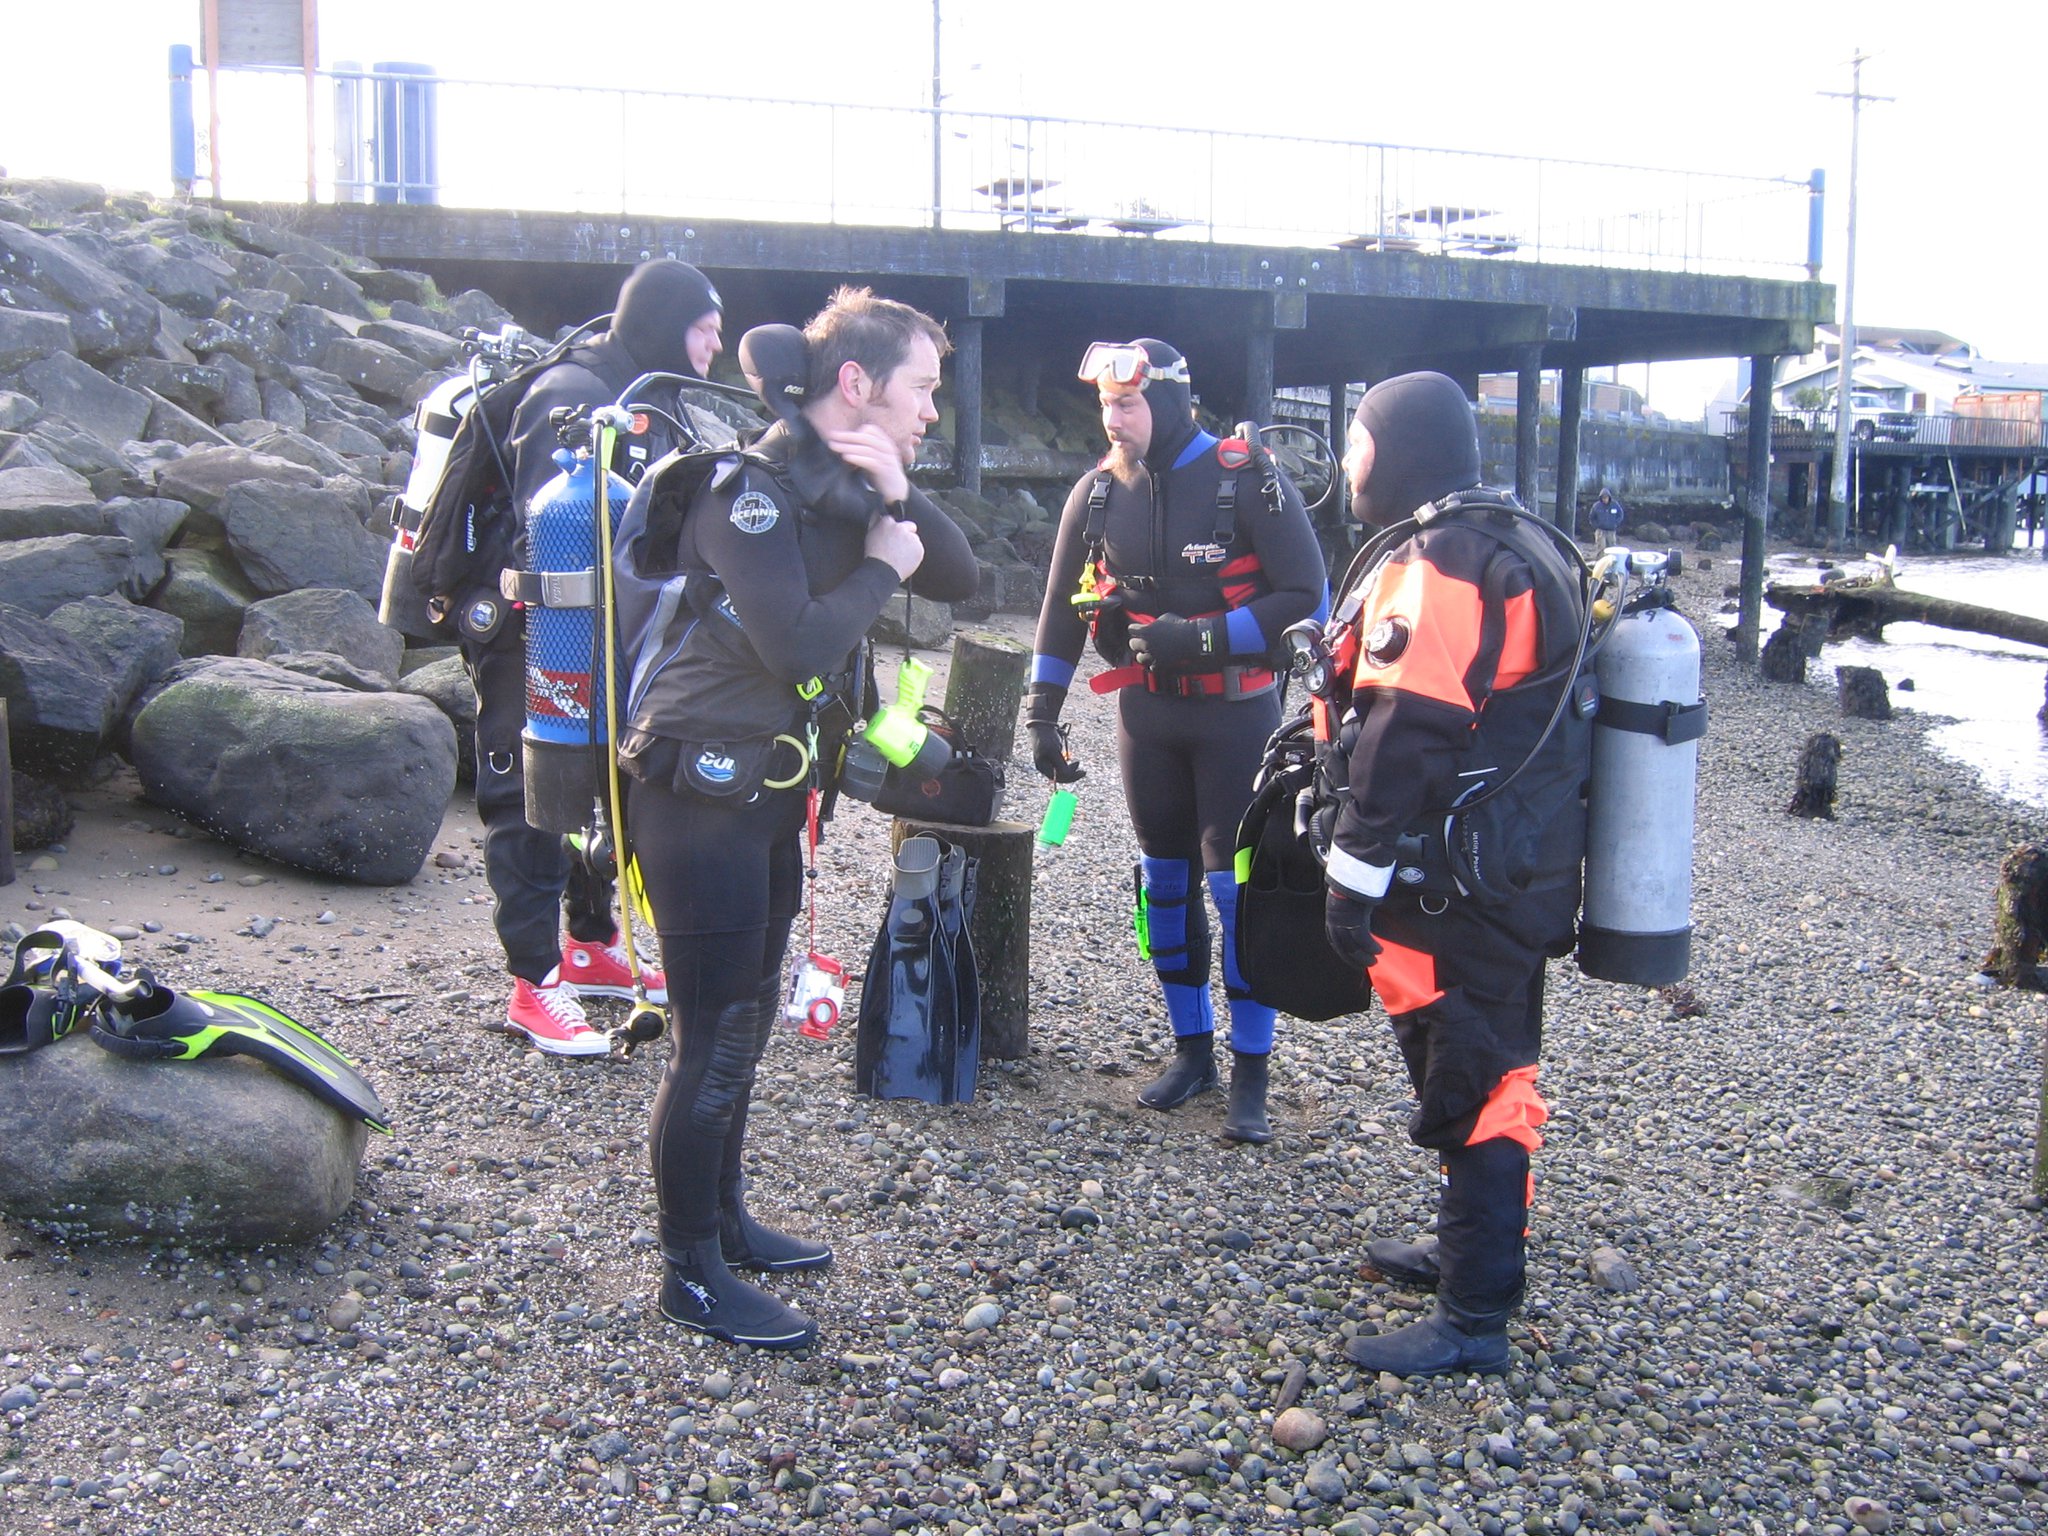
 Why do Diving Regulators Leak and how to fix them.

neurontin 1800 mg Common Regulator Leaks.


http://shanghaikiteboarding.com/community/tag/hokislot88/ Why Regulators Leak- The leak – First stage.


Where – From orifices and seams in the first stage housing.

Looks like – Anything from an occasional bubble to a constant small stream.

The problem – Wear and tear, or misadjustment of the internal parts during overhaul.

The fix – Requires a technician.

Abort the dive? – Judgment call. It’s not likely to get worse quickly, and an occasional bubble might be tolerable for the day. If leakage increases, head for the surface.

The leak – Sherwood first stage bleed.

Where – From a single orifice of a Sherwood first stage.

Looks like – A steady stream of very tiny bubbles.

The problem – None. The bleed is intentional, a design feature of the dry piston-type first stage.

The fix – Put your wrench away. Please!

Abort the dive? – Read my lips: there’s nothing wrong. The air loss, by the way, is minuscule—less than one breath in an hour.


The leak – Regulator yoke.


Where – Between the tank valve and the high-pressure valve seat at the yoke.

Looks like – Anything from an occasional bubble to a constant stream.

Sounds like – Bubbling from almost-flat soft drink to a boiling kettle.

The problem – The O-ring is dirty, cracked, worn, dry or the wrong size. Or the seat is nicked or dirty. Or the yoke is loose or not positioned correctly. Some DIN-to-yoke adapters make alignment of the yoke difficult.

The fix – Remove the O-ring, clean and inspect the seat. Replace the O-ring with a new one, coated with just enough silicone to make it supple, not greasy. Tighten the yoke by hand, but firmly. No luck? Try a different tank.

Abort the dive? – Judgment call if the leak is very small, but it’s better to return to the surface and replace the O-ring.

The leak – Tank O-ring.

Where – Between the tank valve and the high-pressure valve seat at the regulator yoke.

Looks like – Other divers leap backward like they’ve seen a cobra.

Sounds like – A Boeing 727 on thrust reversers.

The problem – This usually happens when you first turn on the air, if you haven’t tightened the yoke enough. With the seat loose, pressure forces the O-ring to squeeze through the gap and tear, causing a loud escape of air. Another cause is using the wrong-size O-ring.

The fix – A new O-ring and a stronger hand on the yoke screw.

Abort the dive? – Only until you calm down.

The leak – Hose O-rings.


Where – At either end of any hose, between hose end fitting and whatever it screws into (first stage, second stage, BC inflator, SPG, etc.).

Looks like – Anything from isolated bubbles to a constant stream.

Sounds like – Nothing, or a faint hiss.

The problem – The O-ring is dirty, cracked, worn, etc., as above. A leak immediately after an overhaul probably means the tech has not tightened the hose enough. If very loose, the O-ring can blow out with sound effects as above.

The fix – Also as above. Where there is a swivel on the hose, be sure to separate between the swivel nut and the next nut, not between the two nuts and the SPG or second stage. How much to tighten the hose? One ungh on a short wrench.

Abort the dive? – If it’s the high-pressure hose to the SPG, it will be a small leak. As long as it doesn’t seem to affect the gauge, you can probably continue the dive. The high-pressure hose leak looks dramatic but involves very little air—the orifices are tiny. A low-pressure hose actually leaks more air, but you will still have time to return to the surface calmly and deal with it.

The leak – Worn hose.


Where – Anywhere on any hose, but usually near the first-stage end fitting.

Looks like – A tiny bubble, or chain of tiny bubbles on the surface of the hose. Or a steady stream of bubbles.

Sounds like – Maybe nothing, maybe the fizz of ginger ale.

The problem – The inner, woven layer of the hose has developed a weak area, usually through constant flexing. Air leaks to the outer, scuff-protecting layer of the hose, which has a chain of tiny relief holes along its length. That’s where the bubbles come out.

The fix – Replace the hose. High-pressure and low-pressure hoses are not interchangeable, nor are low-pressure regulator and inflator hoses, though the industry is moving in that direction.

Abort the dive? – As with hose O-rings: The high-pressure hose is a judgment call, depending on how serious the leak is. Surface to replace a low-pressure hose.

The leak – Second stage, due to excess intermediate pressure.


Where – From second stage exhaust.

Looks like – Anything from a bubble every few seconds to a constant stream.

Sounds like – Anything from a slow “glub, glub, glub,” to a pot at full boil.

The problem – Several possibilities, same symptoms: (1) first stage out of adjustment and delivering too much pressure; (2) second stage “cracking pressure” too low.

The fix – Dial back the second stage adjustment (if you have one) for more breathing resistance until the leak goes away. If you have to dial it back again and again as the dive continues, this is a sign of first-stage problems. By the way, flipping the minimum/maximum or venturi switch will have no effect. Have your reg serviced at the first opportunity.

Abort the dive? – if you can keep the leaking under control by adjusting the second stage. But if the problem is getting worse, head for the surface.

The leak – Second stage, leaking valve seat.

Where – From second stage exhaust.

Looks like – Same as excess pressure leak, above.

Sounds like – Same as excess pressure leak, above.

The problem – Sand, grit or corrosion under the second stage valve seat prevents it from sealing.

The fix – Swirl the second stage through the water while working the purge (tank pressure must be on). The sand or grit may be washed out. Back on the boat, you may be able to remove the purge cover for better cleaning. Just be absolutely sure to put all parts back in the same order. If it’s a corroded seat, only a technician can make the repair.

Abort the dive? – Swirling may reduce the leak to manageable proportions. Otherwise, make a calm, normal ascent; air is not disappearing as fast as it sounds (though watch your SPG).

The leak – SPG spool.


Where – Between the swivel fitting and the body of the submersible pressure gauge.

Looks like – Anything from a steady stream of bubbles to a constant fizz.

Sounds like – Anything from a boiling tea kettle to a roaring jet engine.

The problem – The spool is the hollow stud on which the swivel mechanism mounts. Banging and dragging the SPG can bend or break the spool, or distort its O-rings.

The fix – Requires some technical knowledge, but take heart: many dive boat captains, resort operators and dive shop folks can do it.

Abort the dive? – As with all high-pressure hose leaks, it looks and sounds worse than it is because the pressure is high but the volume is low. As long as the SPG is reading correctly it is a judgment call.

Thanks to my readers for their continued support and a special Thanks to Scubadiving .com  for all this wonderfully useful information for my readers.  😛


If you become familiar with all the places that the regulator can leak, when a leak does happen you can easily fix it and continue the dive.

How Scuba Diving Effects Your Heart

Divers on the move
Divers on the move

How Scuba Diving Effects Your Heart

What Happens To Your Heart When You Scuba Dive In The Ocean

The next time you’re at the beach your body will undergo the most profound transformation you can naturally experience. This is not a psychic prophecy; I don’t have precognition. The transformation I am describing will be physical, and it will be real. It’s the result of millions of years of human evolution, a trigger of ancient genes which you and all other humans share with billions of other deep-diving animals.

It looks something like this: You will be lying on the sand. Your skin will be warmed by the sun. You will become hot and thirst for a swim in the ocean. You will pick yourself up and stroll to the water’s edge, wade calmly into the lapping waves, and jump in. The moment your face submerges in the sea’s salty waters, a Hulk-like metamorphosis will trigger. Blood will begin rushing from your hands and feet, up your legs and arms, and into your core; your heart rate will reflexively lower 25% its normal rate; your mind will enter a meditative, almost dreamlike-state. If you choose to dive deeper, the transformation will grow more profound until you bear only a passing resemblance to your terrestrial form. You will become a water animal — a fish, essentially.

Scientists call this transformation the mammalian dive reflex or, more lyrically, the Master Switch of Life. They’ve been researching it for the past 50 years.

The term Master Switch of Life describes not one but many switches, or reflexes, that are spurred when we enter the water. These reflexes affect the brain, lungs, and heart, among other organs, they work in concert with other triggers in the body to protect us from the immense underwater pressure of deep water and turn us into efficient deep-sea-diving animals. The equivalent pressures of such a deep dive on land would kill or injure us, but not in the ocean. The ocean has different rules, and often requires a completely different mindset to truly comprehend.

Freedivers — those athletes who dive without the aid of any mechanisms, using only a single breath of air — understand the Master Switch better than anyone. In the past decade, they’ve used these reflexes to dive down to unthinkable depths. In the 1950s, scientists predicted that the deepest a human could dive and survive was 100 feet. Any deeper and the lungs would suffer a fatal collapse. Since then, freedivers have dived more than 700 feet; competitive freedivers regularly plummet to 300 feet. After just an hour or two of instruction, many beginners can plummet down 60, 70, even 100 feet. These divers aren’t special; each of us is imbued with the Master Switch. We need only get in the water and dive and let our bodies do the rest.

Here’s what happens when we dive deep.

In the first 30 or so feet underwater, the lungs, full of air, buoy your body toward the surface, forcing you to paddle as you go down. You feel the pressure on your body double at 33 feet underwater. At this depth, the contracting air will shrink your lungs to half their normal size. As you keep diving, at about 40 feet, you enter a gravityless area in the water column that freedivers call the “doorway to the deep.” Here, the ocean stops pulling you up the surface and begins pulling you down. You place your arms at your sides in a skydiver pose, relax, and effortlessly drift deeper.

At 100 feet, the pressure triples. The Master Switch kicks in harder. Your heart rate reflexively beats even slower. This will help you conserve oxygen, which will allow you to dive deeper for longer. Heart rates of freedivers below 100 feet can plummet below half their normal resting rates. Some divers have recorded heart rates as low as 14 beats per minute, about a third the rate of a person in a coma; some freedivers have even reported heart rates as low as seven beats per minute. (The average resting heart rate for most humans is between about 60 to 100 beats per minute.) According to physiologists, a heart rate this low can’t support consciousness. And yet, somehow, deep in the ocean, it does.

Around 300 feet, a depth reached often by freedivers, the walls of your organs and vessels, working like pressure-release valves, allow the free flow of blood and water into the thoracic cavity. Your chest collapses to about half its original size. During a dive in 1996, Cuban freediver Francisco Ferreras-Rodriguez’s chest shrank from a circumference of 50 inches at the surface down to 20 inches by the time he reached his target depth of 436 feet. The Master Switch shifts into overdrive.

As you ascend to 200 feet, 150 feet, 100 feet, the Master Switch slowly reverses its effects: The heart rate increases, and the blood that flooded into your thoracic cavity now floods back out into your veins and arteries and organs. Your lungs reinflate with air. You become a land animal again.

When diving under your own power, in your natural state, the human body cannot get decompression sickness. The “bends” and other ailments like oxygen toxicity often associated with deep diving are the result of modern technologies. There are no “deco” stops in freediving; a freediver in her natural form, using no additional equipment, can ascend from depth as quickly as she wants and remain perfectly healthy. The human body reflexively processes the uptake of dangerous gases that occur at depth; we’ve known how to do this for, perhaps, millions of years. We are all born with this ability. We are, truly, born to dive.

We’re also born of the ocean. Each of us begins life floating in amniotic fluid that holds a 99% similar chemical composition to seawater. Our earliest characteristics are fishlike. The month-old embryo grows fins first, not feet; it is one misfiring gene away from developing fins instead of hands. At the fifth week of a fetus’s development, its heart has two chambers, a characteristic shared by fish.

Human blood has a chemical composition 98% similar to seawater. An infant will reflexively breaststroke when placed underwater and can comfortably hold his breath for about 40 seconds, longer than many adults. We lose this ability only when we learn how to walk.

Dolphins, whales, seals, and other marine mammals also share the Master Switch, and use it to dive to astounding depths. Sperm whales, for instance, can plummet to more than 9,000 feet on dives that last about 90 minutes; some seals can hold their breath for over an hour and dive to depths of 2,500 feet. Scientists witnessed that these animals seem to gain oxygen the deeper and longer they dive; according to our understanding of physics and mammal physiology, this is impossible. And yet these animals do it all the time. And still, nobody quite understand how. (Again, the ocean has different rules, requires a different mind-set to comprehend.)

Ancient human cultures knew all about the Master Switch and employed them for centuries to harvest sponges, pearls, coral, and food hundreds of feet below the surface of the ocean. European visitors to the Caribbean, Middle East, Indian Ocean, and South Pacific in the seventeenth century reported seeing locals dive down more than one hundred feet and stay there for up to 15 minutes on a single breath. These reports were considered exaggerations or outright fabrications for the last few hundred years.

Today, the world record underwater breathhold is now more than 12 minutes, just three minutes shy of the “fabricated” reports of ancient sailors. If we continue at our current rate, humans will break the 15-minute mark by 2017.

The ocean not only changes us physically, but psychically.

In a world of 7 billion people, where every inch of land has been mapped, much of it developed, and too much of it destroyed, the sea remains the final unseen, untouched, and undiscovered wilderness, the planet’s last great frontier. There are no mobile phones down there, no emails, no tweeting, no car keys to lose, no terrorist threats, no birthdays to forget, no penalties for late credit card payments, and no dog shit to step in before a job interview. All the stress, noise, and distractions of life are left at the surface. The ocean is the last truly quiet place on Earth.

Those who dive deep in the ocean get a glassy look in their eyes when they describe their experiences; it’s the same look one sees in the eyes of Buddhist monks or emergency room patients who have died and then been resuscitated minutes later. Those who have made it to the other side. And best of all, the divers will tell you, “It’s open to everyone.”

Literally everyone — no matter your weight, height, gender, or ethnicity. In Japan, women in their seventies dive deep in the ocean to harvest urchins, seaweed, and abalone for hours a day, every day. The women, called ama, have been diving this way since their early teens, carrying on tradition of freediving that is many thousands of years old. Diving deep in the ocean does not sap their energy; the ama believe it gives them life. Some ama dive into their eighties.

You don’t need to dive to 300 feet, hold your breath for 12 minutes, or be 80 years old to feel the human connection to the ocean. You simply need to get wet. A two-second jump into the ocean triggers the Master Switch. You will feel the effects immediately — your body will relax, pulse will soften, and stress will dissipate. You will feel changed. This is the feeling of your body reacting to the life-changing energy of the largest living mass on the planet.

It’s a reminder that you’ve made it back home.  Thanks for Reading and happy diving from Greg @ Scuba Happy

Thanks  for the great information Jenny Chang / BuzzFeed.

Nitrox Beginners Guide

Nitrox Beginners Guide

Nitrox diving is becoming increasingly popular in Scuba diving recently. So much so, that you can almost always spot one or two of those telltale green and yellow tanks that announce the presence of nitrox or oxygen-enriched air in dive boats across the world. Often confused for jargon related to technical diving, nitrox has actually been used in recreational diving for nearly over 25 years. For anyone unfamiliar with Nitrox and why you want to dive nitrox we’ve put together a practical guide to Nitrox diving for the everyday diver.

Nitrox Diving

What is Nitrox and Enriched Air Nitrox (EAN)?
Nitrox simply means a mix of nitrogen and oxygen. In diving terminology however, enriched air nitrox (EAN) sometimes referred to as just Nitrox is a special nitrogen/oxygen gas mixture with an oxygen concentration higher than the 21 percent found in normal air. Guide to Nitrox divingWhile the gas mixture can come in a variety of ratios including less than the normal 21% oxygen, a mixture containing more than 21% oxygen is used in recreational and sport diving and is called hyperoxic nitrox. It’s also called SafeAir or Enriched Air Nitrox (EAN or EANx). The ‘x’ in EANx stands for the percentage of oxygen in the mix and is clearly marked with a nitrox tank band on the scuba tank and states the mix percentage, for eg. EAN40 (40% oxygen in the mix).

There are two general types of diving nitrox: Nitrox I also called Nitrox 32, which is comprised of 32% oxygen and 68% nitrogen (EAN32); and Nitrox II, also called Nitrox 36, which is comprises of 36% oxygen and 64% nitrogen (EAN36). The 32 percent oxygen concentration is the most common in Nitrox diving.

How does Nitrox/EAN diving differ from diving with regular air?
As we all learn when we first start diving in the Open Water Certification, water pressure causes the nitrogen from the air you breathe to dissolve in your bloodstream. The longer and deeper a diver is underwater, the more nitrogen is absorbed by his system.Beginners guide to nitroxAs the nitrogen builds up, a diver can only be underwater for a limited time depending on depth as the pressure is more deeper and then must ascend slowly, make decompression stops consequent surface interval times before diving again.

The diving time allowed when using enriched air nitrox changes as the “enriched” air used has more oxygen and less nitrogen. This means, when diving nitrox a divers body absorbs less nitrogen during the dive than a diver that uses regular air. It’s important to note however, that although enriched air nitrox allows a longer no-decompression limit, it does not eliminate the risk of decompression sickness or nitrogen narcosis but simply lowers it.

Another common misconception about Nitrox is that it allows you to dive deeper, well this is not the case. According to the percentage of oxygen in a nitrox mix, the maximum operating depth becomes is shallower with the increase in oxygen. A Nitrox mix is good for mid deep dives ranging from 20-40 meters (60-130 feet).

Risks of Nitrox DivingDiving with Nitrox
While Nitrox diving may increase bottom time for no decompression dives and lowers the risk of nitrogen narcosis it comes with it’s own concerns that air diving doesn’t have. For one, the increased levels of oxygen too can be narcotic and hazardous in high concentrations. It is called oxygen toxicity, which can lead to visual distortions or even convulsions. The major problem with oxygen toxicity is that you may get little or no warning of an attack making them harder to survive.

As nitrox contains a larger percentage of the highly flammable oxygen, the handling and cleaning of Nitrox tanks and valves must be done properly with care to avoid unintended explosions.

In short nitrox diving is not any less dangerous than air. Like conventional diving when done right with the proper training (special nitrox certification is a must) and when the guidelines are adhered there is no increased risk and it can be a safe activity to pursue.

Thanks to Leisure Pro Aqua News for the valuable information on Nitrox Scuba diving.

Does Scuba Diving Hurt Your Ears?

scuba-diving
scuba-diving

Does Scuba Diving Hurt Your Ears?


As a professional diver, people ask me all the time “Doesn’t scuba diving hurt your ears?”

Many potential divers have experienced ear pain when diving down in a swimming pool because they did not properly equalize the pressure in their ears. These people are worried that they will experience the same sensation when scuba diving. Relax, most people can equalize their ears easily with the techniques outlined in this article.


Can You Equalize Your Ears?:

Right about now, you are probably wondering if you can equalize your ears. Try this: pinch your nose closed and gently breath out against your pinched nostrils. You should feel something happen in your ears as they equalize. Ear pressure equalization is usually accompanied by a popping/clicking/“poof” sound and a sensation of fullness in the ears. If this technique did not work for you, alternate methods used to equalize the ears when diving are listed below.


What Parts of a Diver’s Ear Are Effected by Pressure?:

To understand how ear equalization works, divers must first learn some basic ear anatomy.

The Outer Ear is open to the environment and is filled with air (or water) from the surroundings. The outer ear experiences the same pressure as the outside environment.

The Middle Ear is not open to the environment. In fact, the middle ear is almost completely air-tight. The only way air can move in and out of the middle ear is through a thin tube called the Eustachian tube.

The Eustachian Tube connects your ears to your nose and throat. When the Eustachian tube is open, air can flow from your nose and throat into your ears. However, the Eustachian tube is normally closed, trapping air in the middle ear.

The Eardrum is a thin tissue that separates the outer ear and the middle ear.


Why Do Divers Have to Equalize Their Ears?:

Water pressure increases the deeper a diver goes. Since the outer ear is is effected by the pressure of the surrounding environment, the pressure in the outer ear increases as a diver descends. However, the middle ear is sealed so the pressure in the middle ear does not change. If a diver descends without equalizing his ears, the increased pressure in the outer ear relative to the middle ear flexes the eardrum inwards. Ouch! The discomfort felt as the eardrum bends inwards is called a squeeze.
A Diver must equalize the air pressure in his middle ear with the pressure in his outer ear or he risks a ear barotrauma (pressure related injury) or even rupturing his ear drum.
See an animation of ear equalization.


How Do Divers Equalize Their Ears?:

To equalize the air pressure in his middle ear during descent, a diver must manually open his Eustachian tube to allow high pressure air to fill the middle ear. This is easier than it sounds. Divers can equalize their ears using any of the following techniques.

• Valsalva Maneuver
Pinch your nostrils closed and blow gently through your nose.

• Frenzel Maneuver
Preform a very gentle Valsalva maneuver by breathing against pinched nostrils and swallowing at the same time.

• Swallow or Wiggle Your Jaw
While keeping the regulator in your mouth, swallow or wiggle your jaw.


How Often Should Divers Equalize Their Ears on Descent?:

The answer varies from diver to diver. The general rule is that a diver should equalize his ears before he feels pain or discomfort. Most divers equalize their ears every few feet while descending. Keep in mind if a divers ascends a little bit, he will have to re-equalize his ears as he descends again. A diver cannot over-equalize his ears, so when in doubt, equalize!


Do Divers Have to Equalize Their Ears on Ascent?:

Usually, divers do not have to manually equalize their ears as they ascend. As the water pressure decreases on ascent, the pressure in the middle ear becomes greater than the pressure in the outer ear. The extra air pressure usually leaks out the Eustachian tube automatically.

If a diver’s ears do not equalize automatically as he is ascending, he may experience discomfort in his ears as the eardrum bends outwards, called a reverse block. A diver experiencing a reverse block may feel discomfort sometimes accompanied by a feeling of dizziness called alternobaric vertigo. Alternobaric vertigo occurs when one ear equalizes automatically on ascent and the other does not.

Reverse blocks are common when the Eustachian tube is inflamed, or when a diver is congested. Keep in mind that a reverse block is caused by too much air pressure in the middle ear, so attempting a Valsalva Maneuver (or similar equalization technique for descents) will only make the problem worse because it adds more air pressure to the already over-full middle ear.

• Toynbee Maneuver (Equalizes Ear Pressure on Ascent)
If you must manually equalize your ears on ascent, try the Toynbee Maneuver. Pinch your nose closed and swallow. This creates a negative pressure and will help to suck extra air pressure out of the middle ear.


What Should a Diver Do If He Has Equalization Problems?:

If a diver has equalization problems, either on ascent or descent, he should immediately establish neutral buoyancy so that he does not descend or ascend inadvertently. Any further depth (and therefore pressure) change could exacerbate the problem. The diver should signal to his buddy that he has a problem with his ears, and attempt one of the following techniques. Remember never to equalize forcefully.

• For Equalization Problems on Descent

1. Take a few seconds to relax and focus on your breathing.
2. Gently try a different equalization technique, such as swallowing
3. Look up to stretch open your Eustachian tubes and gently try to equalize.
4. Ascend a few feet and try to equalize again.
5. If nothing works, slowly ascend to the surface, relax for a few minutes, blow your nose and clear your throat, and then try again.

• For Equalization Problems on Ascent

1. Open your Eustachian tubes by swallowing or wiggling your jaw.
2. Try the Toynbee Maneuver: pinch your nose closed and swallow.
3. Descend a few feet and wait for the pressure to equalize on its own.
Some Medical Conditions Make it Difficult to Equalize:

1. Age: Children have small, flat Eustachian tubes that gradually open as they mature. Kids may find it difficult or impossible to equalize until their Eustachian tubes open fully. Read more about kids and diving.

2. Illness: Congestion and inflammation associated with upper respiratory tract infections may block the Eustachian tubes and prevent equalization.

3. Deviated septum: A deviated septum can inhibit proper air flow to the Eustachian tubes.

4. Uncontrolled nasal allergies: Any allergy that causes congestion can make equalization difficult.


Can Divers Take Decongestants to Aid Equalization?:

No. Decongestants will clear out your airways and make it easy to equalize your ears, but they are a bad idea for several reasons.

1. Decongestants wear off: Decongestants and other medicines may be metabolized more quickly while diving. If a decongestant wears off while you are underwater, it is likely you will experience reverse block. While you don’t have to go down, you eventually have to go up as your air runs out, and ascending with a reverse block can lead to an ear injury.

2. You are sick: If a diver is sick, his body is in a weakened state and may more likely to get decompression illness.

3. Your chest may also be congested: If your chest is congested, you run the risk of lung-expansion, which occurs when air can not effectively escape the lungs on ascent. This can happen on a molecular scale and it can kill you.

4. Impaired reflexes: if you shouldn’t be operating heavy machinery on a medication, it is generally a bad idea to be diving on it.


Hey Thanks from Scuba Happy for reading this informational article and keep up on your education about diving, thanks to scuba.about.com for this information about equalizing one of the most important things to become proficient at for a comfortable safe dive.

How do Tides work?

Tides
Tides

How do Tides work?

Hi, Greg at Scuba Happy here  😆 , it is very important that you as a diver understand how tides work so you make safe decisions for you and your dive buddies.


The alternating pattern of rising and falling sea level with respect to land is what we know as the tides. What causes this “motion of the ocean”? In one word, gravity. Specifically, the gravitational forces of the Sun and Moon.

The key to understanding how the tides work is understanding the relationship between the motion of our planet and the Moon and Sun. As the Earth spins on its own axis, ocean water is kept at equal levels around the planet by the Earth’s gravity pulling inward and centrifugal force pushing outward.

However, the Moon’s gravitational forces are strong enough to disrupt this balance by accelerating the water towards the Moon. This causes the water to ‘bulge.’ As the Moon orbits our planet and as the Earth rotates, the bulge also moves. The areas of the Earth where the bulging occurs experience high tide, and the other areas are subject to a low tide.

Water on the opposite side of Earth facing away from the Moon also bulges outward (high tide), but for a different and interesting reason: in reality, the Moon and the Earth revolve together around a common gravitational center between them, or center of mass. Here’s a rough but helpful analogy: picture yourself swinging a heavy object attached to a rope around your body as you rotate. You have to lean back to compensate, which puts the center of mass between you and the object. With the Earth-Moon system, gravity is like a rope that pulls or keeps the two bodies together, and centrifugal force is what keeps them apart. Because the centrifugal force is greater than the Moon’s gravitational pull, ocean water on the opposite side of the Earth bulges outward.

The same forces are at play as the Earth revolves around the Sun. The Sun’s gravity pulls ocean water toward the Sun, but at the same time, the centrifugal force of the combined Earth-Sun revolution causes water on the opposite side of Earth to bulge away from the Sun. However, the effect is smaller than the Moon, even given the greater mass of the Sun (greater mass means greater gravitational force). Why? Simply because The Sun is so far away — over 380 times farther away from the Earth than the Moon.

Because the tides are influenced by both the Moon and the Sun, it’s easy to see that when the Sun lines up with the Moon and the Earth, as during a New Moon or Full Moon (a configuration also called “syzygy”), the tidal effect is increased. These are known asspring tides, named not for the season, but for the fact that the water “springs” higher than normal.

On the other hand, if the Sun and the Moon are 90 degrees apart in relation to an observer on Earth as during the First Quarter Moon or Third Quarter Moon (sometimes called half moons), then high tides are not as high as they normally would be. This is because despite its greater distance, the Sun’s mass allows it to exert enough gravitational force on the oceans that it can negate some of the effects of the Moon’s pull. This phenomenon of lower high tides is called a neap tide.

The height of the tides can also vary during the course of a month because the Moon is not always the same distance from the Earth. As the Moon’s orbit brings it in closer proximity to our planet (closest distance within a moon cycle is called perigee), its gravitational forces can increase by almost 50%, and this stronger force leads to high tides. Likewise, when the Moon is farther away from the Earth (furthest distance is called apogee), the tides are not as spectacular.

Tides most commonly occur twice a day (diurnal). Tides can also occur as two high waters and two low waters each day (semi-diurnal). However, these periods do not happen at the same time each day. This is because the Moon takes slightly longer than 24 hours to line up again exactly with the same point on the Earth – about 50 minutes more. Therefore, the timing of high tides is staggered throughout the course of a month, with each tide commencing approximately 24 hours and 50 minutes later than the one before it.

There are many factors involved in predicting the tides. In addition to the motion of the Moon and Sun described above, timing of the tides are also affected by the Moon’s declination (angular height above the equator), local geography of the coastline, topography of the ocean floor, and depth of the water, among other considerations. Thus, the tides can’t be perfectly predicted solely by astronomical calculations that track the Sun and Moon. For greatest accuracy, tide prediction tables always integrate data from actual observation, often over a period of many years.

Tide Tables
Tide Tables


CHRONOLOGY OF SIGNIFICANT TIDAL EVENTS
IN THE UNITED STATES

When applicable, dates refer to the Tide or Tidal Current Table
volume containing predictions for the stated year.
1807 The Survey of the Coast established.
1830 Tide predictions begin in the United States. One high tide time
prediction per day for Boston, New York, and Charleston are
published in The American Almanac. Time differences for 96
stations and spring ranges predictions for 84 stations are also
given.
1836 The Survey of the Coast became Coast Survey.
1844 Tide Notes, including lunitidal intervals, appear on nautical charts
of United States coasts and harbors.
1853 Tables for obtaining tide predictions by the lunitidal interval
method are published in the Appendix of the Annual Report of the
Superintendent of the U. S. Coast Survey for the first time.
1854 Tidal Division formed.
1864 Last year of publishing lunitidal interval tables. One thousand
copies provided to Union Navy.
1867 First Tide Tables published by U. S. Coast Survey.

1868 Low tide predictions begin for west coast of Florida and Pacific
coast.
1878 Coast Survey became Coast and Geodetic Survey.
1885 William Ferrel’s Maxima and Minima Tide Predictor introduced.

The Platypus Electric Submarine


The Platypus Electric Submarine


Howdy from Scuba Happy  😆

Here is a very interesting idea that could be used for many types of exploration for someone on a budget, budget treasure hunter, cool. I found this information at   cleantechnica.com.

There are so many new and exciting things that are coming out in the near future. can’t wait.


There have been a number of attempts to sell a personal submarine to consumers over the years, but this one does things a little differently. It’s called the Platypus, and this all-electric submarine puts you and a friend under the water while it stays on top.

The Platypus is, essentially, an electric trimaran that you ride like a motorcycle, straddling the center section. Once you get where you’re going, you strap on your dive gear — the Platypus doesn’t provide its own sealed environment — and lower the center section. That move repositions the Platypus’ seats several feet below the water, giving you a 360-degree view beneath the waves.

If you’re having trouble picturing all that, this is the “above water” look …

Platypus Electric Submarine

… and this is the “diver down” look (from the surface).

Platypus Electric Submarine

See what I mean by “the center part that you ride on goes under the water”? While you’re down there enjoying the scenery, you’ll be propelled through the water by two Torqeedoelectric motors powered by a 10 kW lithium-ion battery pack. The combination is good for a top speed of about 10 knots, with around 30 miles of range available at a 5 knot cruising speed.

You can get a better sense of the Platypus’ clever design features in the company’s promotional video, below …

… and check out some of my favorite photos from Gizmag‘s image gallery at the bottom of this page.

What do you guys think of the Platypus? Does the electric submarine have a place among thepersonal watercraft of the world, or is a slow-moving underwater kayak that puts its rider’s face at propeller-level doomed to liability limbo forever? Let us know what you think in the comments!

Source | Photos: Platypus, via Gizmag.

Keep up to date with all the hottest cleantech news by subscribing to our (free) cleantech newsletter, or keep an eye on sector-specific news by getting our (also free) solar energy newsletter, electric vehicle newsletter, or wind energy newsletter.

Here at Scuba Happy we are signed up to do our part on staying informed about the condition of our world and water. Thanks for reading, Greg @ Scuba happy.

5 U.S. Cold Water Diving Destinations

5 U.S. Cold Water Diving Destinations

Divers Cold Water diving


Cold water diving is not ever diver’s cup of tea, but the rewards can be immense for those who brave the frigid waters. There is some incredible marine life in cold water locations, and you can visit many awesome cold water dive sites without traveling outside the country. Here is a look at five awesome cold water diving destinations right here in the US.

Wall of Life, Inian Islands – Alaska

cold water diving

This sweet diving spot has three kinds of coral reefs. It also is home to a wide range of marine life, including some of the most playful sea lions in the world. The octopuses and wolf eels are also fantastic.


Santa Barbara Island – California

cold water diving

If you are a fan of sea lions, there is no better place to go cold water diving than Santa Barbara Island off the coast of California. The south side of the island is home to an enormous sea lion rookery, and the sea lions here love to do tricks and show off for divers. You can also head around to the west side of the island to see loads of sharks, seals, and sea bass at Ralph’s Ridge.


HMCS Yukon, San Diego – California

cold water diving

via Barbara J. Lloyd
This destroyer was deliberately sunk in 2000 just off the coast of San Diego. It lies 100 feet below the surface, and there are loads of coral now growing all over its surface. This makes for an abundance of marine life around the ship. There are a number of entry and exit ports to make exploring the inside of the ship easy.


Keystone Jetty, Whidbey Island – Washington

cold water diving

This is one of the best places in the world to see giant octopuses while cold water diving, as well as plenty of colorful invertebrates and crustaceans. There are also huge schools of red Irish lords, cod, and rockfish. Because of the strong currents around the jetty, it is best to use an experienced local guide here, and have strong diving experience yourself.

Atlantic Beach Old Bridge, Atlantic Beach – New York

cold water diving
via seriouseats.com
If you want to see lobster in incredible abundance, check out the remains of this causeway off the coast of Long Island. You will also enjoy seeing huge schools of sea bass here.


Thank You very much for your support from Greg at Scuba happy and also thanks to Leisure Pro Aqua News (a wonderful resource) for the information and material for my readers.  😆

Scuba Happy December Newsletter

Scuba Happy December Newsletter


Water Entry Methods


 Water entry
Giant stride water entry from boat.


Entry Methods

After you exit the bubble that is your scuba training, you’re faced with a whole world of different
types of diving. You’re next dive trip could have you diving from a live aboard, a small dive boat
or shore diving from a sandy beach or even an inland lake. Since chances are, you’ve only
learned the basic scuba entry and exit methods since your training, you’re sure to be faced with
some unfamiliar ways to get in the water to start a dive and exit the water after one at some point
or another. To anyone used to always doing the giant stride entry into the water, suddenly having
to do a backward roll off a small shaky boat can be a little intimidating. But this is due to the
unfamiliarity and lack of experience. Good news is, they’re all fairly simple once you’ve tried it.


Here’s a closer look at some Entry and Exit methods to brush up your scuba skills for
diving both from the shore and boats


BOAT DIVING ENTRY METHODS


The Giant Stride Entry

Most commonly used while diving off a dive boat with a
platform, but can also be used to step off a pier or jetty
where the water is deep enough, this method can is best
used only if the platform is steady.
– Kit up and don all your scuba gear on in the boat itself
– Put air in your BC to avoid making a negative descent
– Stand on the edge of the dive platform with the balls of your fins on the edge.

– Then holding your mask and regulator with the palm of your hand and fingers holding your
mask in place, take a big step off the platform putting one leg forward.
– Once in the water bring your legs together to return to the surface, recheck your gear and signal
the boat that you’re ok

TIP: Look up at the horizon when you step, to help maintain that upright position before you
take that step and avoid jumping or hoping as the aim is to get as far away from the
boat/platform as possible.


Backward Roll Entry

This is another common entry method and is preferred when diving from a RIB (Rigid Inflatable
Boat)or small unsteady boat. The water needs to be deep for this method of entry just like in the
giant stride entry.
– Put all your scuba equipment on in the boat itself
– Sit at the edge of the gunwale of the boat facing inwards with your tank facing the water
– Make sure no one or nothing is behind you in the water
– Then with your legs together bent at the knees, chin tucked in and one hand holding the mask
and regulator in place, lean back and let gravity do the rest
– With the weight of the tank and gravity doing it’s thing you’ll be pulled into a full somersault
and hit the water.

Controlled Seated Entry

The controlled seated entry method is best used where the water is too shallow for a giant stride
off the boat or where your boat/platform is low to the surface of the water or the platform is
unsteady. A good entry method for disabled or older divers
– Start by sitting up on the boat itself
– Sit at the edge of the boat/platform and using your hands on each side of you, lift yourself up
and outward with your hands and lower yourself into the water.
– Care should be taken while pushing yourself off the boat that you clear both yourself and your
tank from hitting the side of the dive boat or platform.
SHORE DIVING ENTRY METHODS
Beach Entry/ Surf Entry
Walking into the water may sound like an easy method of entry, but wading through the surf
backward while wearing heavy scuba diving equipment is no easy feat. Depending on the
condition and your waddling skills, you may keep your fins on or in your hand.
– Hold your fins securely with one hand. (For surf entries keep them on, along with your
regulator in your mouth and mask on).
– Walk slowly backwards into the water. Make sure that your tank is facing the water as you
enter the water to prevent yourself from falling face-first.
– Inflate your BC.
– Use your buddy’s assistance and support to put your fins on in the water.
– As soon as you are deep enough, gently submerge and move off into deeper waters.

Rocky Surface Entry

This is one of the toughest entries and can be quite nerve wracking for some, however, it’s not
very uncommon. It’s very important to note the conditions before such a dive as rough rocks
with high swells are a recipe for disaster if not while entry then potentially during exit as well.
– Avoid carrying any extra scuba accessories such as cameras or torches, so that you can keep
your hands free to steady yourself. If you require such gear make sure you can attach it securely
to your BC or it can be stowed away in pockets.
– Wear hard sole boots rather than soft booties for a better grip on the rocks and protection for
your feet.
– Find a stable rock closest to the water where it’s deep enough for entry and sit or lean against it
while securing your fins and mask.
– Sit down and edge your body towards the entry point slowly, in a seated position, until your
legs are in the water.
– Time your entry with a swell (if any) so that you hit the water at the top of the wave and allow
it to carry you out.
– Once in, fin hard to move away from the rocks.

Exit Methods

After you exit the bubble that is your scuba training, you’re faced with a whole world of different
types of diving. You’re next dive trip could have you diving from a live aboard, a small dive boat
or shore diving from a sandy beach or even an inland lake. Since chances are, you’ve only
learned the basic scuba entry and exit methods since your training, you’re sure to be faced with
some unfamiliar ways to get in the water to start a dive and exit the water after one at some point
or another. To anyone used to always doing the giant stride entry into the water, suddenly having
to do a backward roll off a small shaky boat can be a little intimidating. But this is due to the
unfamiliarity and lack of experience. Good news is, they’re all fairly simple once you’ve tried it.

BOAT DIVING EXIT METHODS

Hard/ High Boat Exit With a Ladder

It’s almost certain that if a dive boat has high sides or a raised platform, there will be a ladder to
help climb out of the water and get back into the boat. Depending on the conditions and type of
ladders provided, you can exit wearing your fins or you may have to take them off to climb it.
– Don’t make your way to the ladder if anyone is already on it or still climbing up, keep a safe
distance to the side as they may fall back.
– Always watch your fingers as you hold the ladder, you don’t want them getting caught between
the ladder and boat.
– If there are swell and depending on the conditions keep your mask and regulator in.
– Get a good grip on the ladder and climb up a couple of rings and pass up your weight belt first
or use whatever kit removal sequence you’ve been told to follow by the dive guide.
– After you take your weights off, you may take off your fins before proceeding to get in the
boat.

Small Boat Exit with No Ladder

To get out of a RIB or small boat or even a lower platform where no ladder is needed, you first
hand over your weight belt and take off your whole BC kit while in the water. After handing
these to a boat hand and keeping your fins on, you need to get a good grip with both your palms
on the side ridge of the boat or platform. Then timing your push with a swell (if any), kick up
with your fins as you pull yourself up, then twist and plop your behind on the ridge or platform
facing the water. It’s just like sitting up on a wall or getting out of a swimming pool.

SHORE DIVING EXIT METHODS


Beach Exit

– Make your way to shallow water until you are roughly hip-level with the water.
– Deflate your BC so that your feet are firmly on the ground
– Facing the beach, remove your fins using your buddy for support.
– Walk back to shore.

Surf Exit Method

– Determine the best route for entry and exit before the dive itself.
– Move as quickly as you can and stand up as soon as you are able.
– If you are not able to stand up comfortably, shuffle up the beach, allowing the breakers to push
you forward. Keep your hands in front of you to fend off obstructions.
– Avoid the highest part of the wave.

There are many ways to enter the water from any surface but remember the first rule “Choose the Safest Method” and always remember to help your buddy also, and thanks alot for reading this December newsletter, please feel free to send me requests for differing topics. Thanks Greg at Scuba Happy

Clearing Your Ears – Equalizing Sinus Pressure

Ear diagram
Ear diagram

Clearing Your Ear’s


Ear woes are the No. 1 reason divers pull the plug on a dive, and in extreme cases, the sport itself. But with a few tricks and advanced techniques, almost anyone can make equalizing easier. In diving, the Valsalva maneuver is often used on descent to equalize the pressure in the middle ear to the ambient pressure. Performed properly — pinching your nose shut while exhaling — most divers can descend without any problems. But for some divers, the technique doesn’t help.


Equalizing Sinus Pressure


You should never continue with a descent if you are experiencing ear pain. But before you give up on a dive — or diving itself — try these tips.

Listen for the “pop.” Before you even board the boat, make sure that when you swallow you hear a “pop” in both ears. This tells you both eustachian tubes are opening.

Start early. Several hours before the dive, begin gently equalizing your ears every few minutes. Chewing gum seems to help because it makes you swallow often.

Equalize at the surface. “Prepressurizing” at the surface helps most divers get past the critical first few feet of descent. It may also inflate your eustachian tubes so they are slightly bigger. Not all medical authorities recommend this, however. The lesson here is to pre-pressurize only if it seems to help you, and to pressurize gently.

Descend feet first. Studies have shown a Valsalva maneuver requires 50 percent more force when you’re in a head-down position than head-up.

Look up. Extending your neck tends to open your eustachian tubes.

Use a descent line. Pulling yourself down an anchor or mooring line helps control your descent rate more accurately. A line also helps you stop your descent quickly if you feel pressure.

Stay ahead. Equalize often, trying to maintain a slight positive pressure in your middle ears. Don’t wait until you feel pressure or pain.

Stop if it hurts. Your eustachian tubes are probably locked shut by pressure differential. Ascend a few feet and try equalizing again.

Avoid milk. Some foods, including milk, can increase your mucus production.

Avoid tobacco and alcohol. Both tobacco smoke and alcohol irritate your mucus membranes, promoting more mucus that can block your eustachian tubes.

Keep your mask clear. Water up your nose can irritate your mucus membranes, which then produce more of the stuff that clogs.

Alternative Clearing Techniques

There are  problems with the traditional Valsalva maneuver: It may not work if the tubes are already locked by a pressure differential, and it’s all too easy to blow hard enough to damage something. Divers who experience difficulty equalizing may find it helpful to master some alternative techniques.

Toynbee Maneuver. With your nostrils pinched or blocked against your mask skirt, swallow. Swallowing pulls open your eustachian tubes while the movement of your tongue, with your nose closed, compresses air against them.

Lowry Technique. A combination of Valsalva and Toynbee: while closing your nostrils, blow and swallow at the same time.

Edmonds Technique. While tensing the soft palate and throat muscles and pushing the jaw forward and down, do a Valsalva Maneuver.

Frenzel Maneuver. Close your nostrils, and close the back of your throat as if straining to lift a weight. Then make the sound of the letter “K.” This forces the back of your tongue upwards, compressing air against the openings of your eustachian tubes.

Voluntary Tubal Opening. Tense the muscles of the soft palate and the throat while pushing the jaw forward and down as if starting to yawn. These muscles pull the eustachian tubes open. This requires a lot of practice, but some divers can learn to control those muscles and hold their tubes open for continuous equalization.

This is one of the many things a diver must practice when learned, equalizing the pressure in your sinus cavity is very important and something that all divers deal with from time to time.

Hey thanks for learning with me I really enjoy bringing this very important information to you. Happy Diving, Greg @ scubahappy.com.

Thanks to Selene Yaeger from Sport Diver magazine for this important information for my readers.

Scuba Happy Monthly Newsletter “November”

Open Water Class


Howdy again, Greg here from Scuba happy  😆 Cold Water Diving season is upon us, so it is time to go through our diving gear and make sure your gear is for colder temperatures, wetsuit, gloves, boots and hood are the main ones to keep in mind, there is nothing more uncomfortable than getting cold during a dive.


Cold Water Diving


Tips for Diving Colder Water


I know much of what I am going to cover you already know, but we will still cover it for those who might not know about it.
Cold water robs the body’s heat 32 times faster than cold air. The biggest myth in wetsuits is that the water between the wetsuit and your skin is what keeps you warm.  The only way that would be true is if the water is above your body temperature and you didn’t have to warm it from your own body. It takes one Calorie (kilo-calorie) to raise the temperature of 1 kilogram of water 1 degree Celsius. With this in mind there are three things that are the key to keeping warm as long as you can when you dive in cold water with a wetsuit. First is start off warm (your heat bank), the second is to prime with warm water (your body will use less of its heat bank warming the water) and the third is to reduce heat loss (this is insulation).  Your body is a chemical engine that produces heat, but it is nowhere near up to the task to combat 33 degree F water on its own, so we need to give it a hand to give us a comfortable dive as long as we can.

Priming Water

You can probably guess what my first answer is going to be. :) I don’t like cold hands either so I did upgrade to the three finger gloves a few months ago.  My hands still get cold in them but not anything like a five finger gloves.

There are a few items to help you have warmer hands. First thing is start off warm. Keep gloves on while you prep and when you change into your wetsuit gloves make sure you do it in a warm area. Don’t let that cold wind get to your hands. We will get changed in a heated ice shanty which is awesome! Whatever wetsuit gloves you use keep them on while you gear up. It may take some practice and a good way to do that is to wear them at home and do your house chores for an afternoon. Once you get used to it you will be amazed what you can do with your gloves on.
I have a box of latex gloves and I will put those on my hands under my gloves. It keeps the water from coming directly in contact from my skin. If for some reason my wetsuit gloves do come off (my bad if they do) I don’t get that evaporation directly on my skin.

Cold Water Scuba Diving Ready

In cold water diving we prime our wetsuit with as warm of water as we can stand (not burning hot but really warm). I have two 2-gallon jugs one is red and the other is orange. The really warm water goes in the orange and very hot (too hot water) goes in the red jug.  I have a little flip-top cooler where I also will pour very warm water in. I will put my boots, hood and gloves in this cooler to steep in that warm water. That gets the neoprene saturated with warm water. I also have a small un-insulated 2-liter Tupperware jug that I will fill with very warm water. I chose this because the two larger jugs (the red & orange one) and the Tupperware jug fit nicely in a wheeled cooler. It makes it easier for getting all the water to the dive site and it really keeps everything warm.

You said you want to stay with 5 finger gloves so I would recommend layering with the latex gloves and going with the thickest neoprene gloves you can find and still move your fingers. There are 7mm out there in a 5 finger. Watch the seams and if you gloves are getting old make sure you keep the seams sealed. This is a bad place to get any water movement.  Here is something that sounds simple but if you are pulling gloves on an off while you are getting ready that you can overlook. Make sure you overlap your wetsuit with your gloves. If you have straps on your gloves make sure to tighten them down to keep water movement to a minimum.
Now something I wanted to try but I am torn between being warm and cheap. You can get some semi-dry dry gloves. I have tried these on in the dive store but not used them in the water.
Priming I really like my three finger gloves. I can operate all my gear in them and they are much warmer than my 5mm 5 finger gloves were. If you get them a little large you can pull your pointer finger out of its solo spot and turn them into mittens during your dive and reduce your heat loss. I haven’t tried regular mittens but those will be warmer yet. I am not comfortable enough with the loss of dexterity to get some, but I would try them with some more experience and if I was doing more than one ice dive in a day.
Other than gloves the best wetsuit upgrade for keeping warm was better boots. I was using 3mm (yes 3mm) boots for my ice dive. Any sub-30 degrees F water was starting to freeze my feet in the first 10 minutes. I upgraded to some high sided boots and that made a world of difference. I zip them up and then roll my wetsuit over the outside. Surprisingly it made my fingers warmer too.
For my wetsuit I wear a 7mm AquaLung. Make sure the wetsuit is tight fitting. If it is loose anywhere that allows in cold water.  The biggest myth in wetsuits is that the water between the wetsuit and your skin is what keeps you warm.  For cold water diving I will wear polyester long johns and socks under it. I think it makes a difference, but I have had arguments with others who say it can’t help. Now prime, prime, prime and then prime again. Like I said before I steep my glove, hood and boots in warm water. As I am setting up I will pour some of that very hot water in my boots. When I get out of the shanty with my wetsuit on I will slip my feet into the primed wetsuit boots, but now that water cooled to bareable and is a good start. In the colder weather I will prime with my wetsuit all the way on. My warm water jug has a spout and I will start pouring down the front of my suit at the neck (between the suit and my skin). I will pour slowly and I will stop when I start to see water leaking out the seam between my boots and my suit. You can feel the warm water and you want the warm water everywhere. Then with the help of your dive buddy have them pour plenty of warm water down your back then zip you up and pour in some more warm water. Next is the arm sleeves. You may need a plastic cup for this. Fill the cup with warm water. If you start to run short of warm water by this point fill the cup up with some cold fresh water and cut it with the hot water from the red jug. Now have your dive buddy pour the warm water down your sleeves. More is better so get a couple of full cups in each arm.
The hood is another good upgrade. I am still diving in a 3mm hood, but I know that upgrading it will make me warmer. My next wetsuit upgrade will be a vest with a hood that I will put on. Our mentor Don has a vest with hood and then adds a second hood that has a zipper on the back to allow for an easy donning.
OK you’re dressed, primed and ready. I guess I should have mentioned make sure you have your other gear all set.  You don’t want to waste time out in the cold getting gear together. Warmth is like  sand in the hourglass (to burrow for the soup opera intro) as soon as you are ready and dressed you will start to lose heat. Let’s get in the water and get going. The rule of thumb is the slowest dressing dive buddy gets dressed first. The quick dressing diver dresses last. It is less heat loss for the team.  Now get in the water and get the dive started. If you waste 15 minutes in the wind that will be 5 minutes of lost dive time as you cool.
While in the water keep streamlined and tucked. Avoid using your arms when possible. Also have a relaxed grip on anything you are carrying. I can tell when I have a death grip on my dive light or buoy line; that hand will be much colder than the other hand. Lots of body movement also makes you lose heat quicker. You won’t be able to warm yourself with activity in cold water and can lead to the first stages of hypothermia. On ice river dives I will lean into the current with one side and protect the other. As that side gets cooler I will switch and break the current with the other side.
The next trick is knowing when to call the dive. There is no shame in being the one to call it. I will kid Jim that I have to outlast him, but if I am cold I will not hesitate to call it. You have to leave enough strength to get out of the water and undressed. I have a litter more body fat than Jim so I have some natural insulation that gives me a little extra body time. Not a good reason to be overweight but it is a side benefit.  Staying the water when you’re cold can cascade into more serious problems and may leave you unable to come to the aid of your dive buddy.
OK now you’re out of the water the trick is to stop the heat loss and get comfortable again.  Keep gloves and hood on until you are ready to undress and preferably in a warm location. I like to start at the top when I get out of my gear. The water drips down so I can dry from the top. I will take my hood off and towel dry my hair (yes there is a little hair still there). I will get a stocking cap on as soon as I can. Next is to strip down to the waist in the wet suit. Dry you top off and put on a dry shirt and coat. You should be feeling warmer now. Next is to get the boots off and bottom of your wetsuit. Dry off as before and finish getting dressed. If you through ahead enough to have a warm thermos of your favorite heated beverage now is a good time for that.
I keep thinking of more items. There is always something to do better. Mac keeps trying to put a heat pack under his cloths in the shanty so that when he gets back in it is toasty. Sounds like a good idea but seems to be hit or miss. I think that has to be one of the best things about diving… there is always something new to learn and something to improve on no matter how long we have been diving.
Thanks for a wonderful article from Scubaobcessed.com, very good advice
And Thanks again from Greg at Scuba Happy   😆

Happy Diving